Posts in Kitchen Garden
Thyme to Think Tomatoes

Heirloom Tomatoes Grown in a Past Summer

I’ve written a lot about tomatoes in the past, grown a lot of tomatoes, and certainly cooked and eaten a lot of tomatoes. Tomatoes are a summer reward to all. In the past, I’ve picked up my favorite tomato seedlings such as Celebrity, Early Girl, Sungold, Black Krim, and Cherokee Purple. I planted them in my prepared garden in April, and lovingly maintained them from spring into summer harvest. At some point, these tomato plants grow and grow and become unruly. The ripe tomatoes are wonderful, yet the garden seems to have gotten out of hand.

This year I decided to intentionally contain my tomatoes and grew them in a different way, mainly in containers. The various seed catalogs have tomato selections for everyone’s taste, literally.

Please remember determinate tomatoes reach their full maturity quickly and set all of their fruit at one time. Most tomato plants suitable for containers are determinate. Indeterminate tomato plants are vining, need pruning at times, have an extended length of growing season, and continue to produce fruit throughout the season.

New Tomato Varieties I Am Growing This Year:

1) Shady Lady. This is a determinate hybrid tomato that needs no staking. I really like that idea. It is deep red in color, with heavy foliage, and great flavor. It is known in California as a top performer in tomato fields. I first heard about this Shady Lady tomato from Georgeanne Brennan, when I took her weekend Provence class at her home and garden outside of Davis, California. I don’t think she is hosting her cooking class anymore. She raved about this tomato, how many plants she grew, and how she shared them exclusively with her chef friend for his kitchen. This is the year to try Shady Lady. Readily available online.

2) Tasmanian Chocolate. Renee’s Garden Seeds. Heirloom container tomatoes with short vines that offer abundant mahogany-red tomatoes with rich, delicious, well-balanced flavor.

3) Cherry Falls. John Scheepers Kitchen Garden Seeds. Beautiful tomato plant with oodles of cascading cherry tomatoes.

4) Husky Cherry Red. Home Depot. I picked this up on whim because it is very suitable for containers.

Starting Seeds Indoors

I started these seeds in a seed tray and with seed starting mix from Grangetto’s I have had for a couple of years stored away. The seed warming mat really works and helps seeds germinate quickly. You can find all kinds of seed warming mats online. I poked a small indention into each soil-filled cell with a chopstick. Seeds are tiny. Keeping your soil moist with a spray water bottle is critical. I placed my sowed seeds and mat on top of my dryer in my laundry room where there is a skylight and under the counter lighting, also critical for germinating your precious seeds.

I am experimenting and starting more seeds other than tomatoes, such as different basils, heirloom Italian eggplant, different lettuces, kale, and more. Another honorable mention is Fino Verde Little-Leaved Basil offered at John Scheepers Kitchen Garden Seeds, that is applauded by chefs, for the tiny size of leaf, depth of flavor, and rich color.

Please share if you are growing flowers and vegetables from seed for your garden and potager! I would love to hear about your seed adventures!

Related Past Tomato Blog Posts

Bon Appétit et Bon Weekend….Bonnie

Elegant Risotto with Butternut Squash

Butternut Squash from the Garden

When I was looking through recipes around Thanksgiving I happened up this recipe, Risotto with Butternut Squash, Gorgonzola, and Toasted Pecans. This has been a favorite of mine from the December 2003 Oprah magazine. Somehow I had forgotten about it.

I still have home-grown butternut squash from the garden, and on a recent trip to an Italian specialty store, I picked up a pound of Carnaroli rice, considered the best risotto rice overall for making the creamiest risotto due to its very high starch content. Carnaroli rice is available on Amazon, specialty food stores, and gourmet food websites. This recipe calls for arborio rice which is a more common available rice for making risotto.

Home-grown butternut squash, fresh sage leaves, and a new box of Carnaroli rice said it was meant to be.

This is a delightful recipe full of flavor, depth, and texture with soft golden butternut squash, sweet Gorgonzola, and crunchy toasted pecans for crunch. Chef Rori Trovato recommends serving this risotto with a California Zinfandel or Central Coast Syrah. She also provides below simple interesting variations on this recipe. Enjoy!

Sauté the Rice and Butternut Squash Together

Risotto with Butternut Squash, Gorgonzola, and Toasted Pecans

Lovingly Adapted from Chef Rori Trovato

Oprah Magazine, December 2003

Ingredients

  1. 4 cups low-sodium chicken or vegetable stock

  2. 2 tablespoons extra-virgin olive oil

  3. 1/2 small onion , finely chopped

  4. 1 cup arborio rice

  5. 2 cloves small garlic , finely chopped

  6. 1 medium butternut squash (about 1 1/2 pounds), peeled, seeded, and cut into 1/2-inch cubes

  7. 8 large sage leaves , chopped

  8. 2 tablespoons butter

  9. 2 teaspoons salt

  10. Freshly ground pepper

  11. 1/3 cup crumbled Gorgonzola

  12. 1/4 cup chopped toasted pecans

Directions

In a saucepan, bring the stock to a boil. Then reduce heat to low.

In a large, heavy-bottomed saucepan over a medium-high flame, heat the olive oil. Add the onion. Sauté for 2 minutes, stirring constantly. Add the rice; stir until well coated, about 1 minute. Add the garlic and squash and continue to stir another 30 seconds. Lower the heat to medium and add 1/2 cup hot stock. With a wooden spoon, stir until the liquid is absorbed but the rice isn't sticking to the pan. Continue adding 1/2 cup stock and stirring until the stock is absorbed, about 20 to 25 minutes, or until the rice is tender. Recipe Note: I was taught to stir your risotto in a clockwise direction, the whole time, for waking up the starch and in turn creaminess in your rice kernels. I also used 1 teaspoon of salt rather than two.

Remove from heat; add the sage, butter, and salt. Season with pepper. Stir to combine. Place risotto in a serving bowl and top with Gorgonzola and pecans. Makes 4 servings.

Recommended variations

  • Cranberry Risotto: Add 1/2 cup dried cranberries with the garlic and squash.

  • Barley Risotto: Substitute one cup barley for the arborio rice and use one additional cup of stock. Barley has a nuttier taste and a less creamy texture than rice.

  • Indian-Spiced Risotto with Shrimp: Omit the squash and add one teaspoon cumin, 2 teaspoons curry powder, and 1/4 teaspoon red pepper flakes. When the rice is about two-thirds done, add 1 1/2 pounds medium-size peeled and deveined shrimp. Continue cooking until the rice and shrimp are cooked through. Finally, substitute 2 tablespoons chopped cilantro for the sage, omit the Gorgonzola, and increase the amount of butter to 4 tablespoons.


Elegant Risotto with Butternut Squash

Please share if you have a favorite risotto recipe you like to make.

Bon Appétit et Bon Weekend….Bonnie

Delicious Roasted Tomato Soup
Home-Grown Tomatoes

Home-Grown Tomatoes

There are lots of wonderful recipes for your home-grown tomatoes, like bruschetta, tomato tart, caprese salad, or just an awesome BLT sandwich. I remembered reading recently the Roasted Tomato Soup recipe from Miss Maggie’s Kitchen cookbook, and wanted to try it. So simple, so seasonal, so divine.

Steamy Roasted and Charred Soup Ingredients

Steamy Roasted and Charred Soup Ingredients

Roasted Tomato Soup

Lovingly Adapted from Miss Maggie’s Kitchen Cookbook

Ingredients:

2-1/4 pounds assorted tomatoes

2 red onion quartered

4 cloves garlic, unpeeled

3 tablespoons extra-virgin olive oil

2 tablespoons balsamic vinegar

2 teaspoons sugar

Leaves of three sprigs of fresh thyme

Leaves of 3 sprigs fresh basil

1-1/2 cups warm vegetable broth

salt and freshly ground pepper

Directions:

1) Preheat the oven to 325 degrees F.

2) Rinse the tomatoes, cut them in half, and set on a rimmed parchment-lined baking sheet with the cut side up.

3) Place the onions on the baking sheet, then crush the garlic cloves with the flat side of a chef’s knife and scatter them around the tomatoes and onions.

4) Drizzle with the olive oil and balsamic vinegar, sprinkle with the sugar and thyme leaves, and season with salt and pepper. Roast for 50 minutes, then turn on the broiler and cook for an additional 5-10 minutes, until the tomatoes and onions are lightly charred and caramelized.

5) Remove the skin from the garlic cloves and place in a blender with the tomatoes, onions, any pan juices, and the basil. Process until smooth, adding the warm broth in two or three stages, until the soup reaches your preferred consistency. Serve warm or cold. Makes 5-6 servings.

Recipe Note: Like most soups, this soup is even more delicious the next day. I used “Fresh Basil” Temecula Olive Oil with my Early Girl and Celebrity Tomatoes.

Soup is On After Blending

Soup is On After Blending

This soup was delicious the day I made it. However, the next day I couldn’t resist enjoying it with an extra aged cheddar melted cheese sandwich with a touch of peperoncini on rustic country bread. Yum!

Good  to the Last Spoonful

Good to the Last Spoonful

Related Linked Posts:

Miss Maggie’s Kitchen, Relaxed French Entertaining

Bon Appétit et Bon Weekend….Bonnie

Roasted Butternut Squash Salad
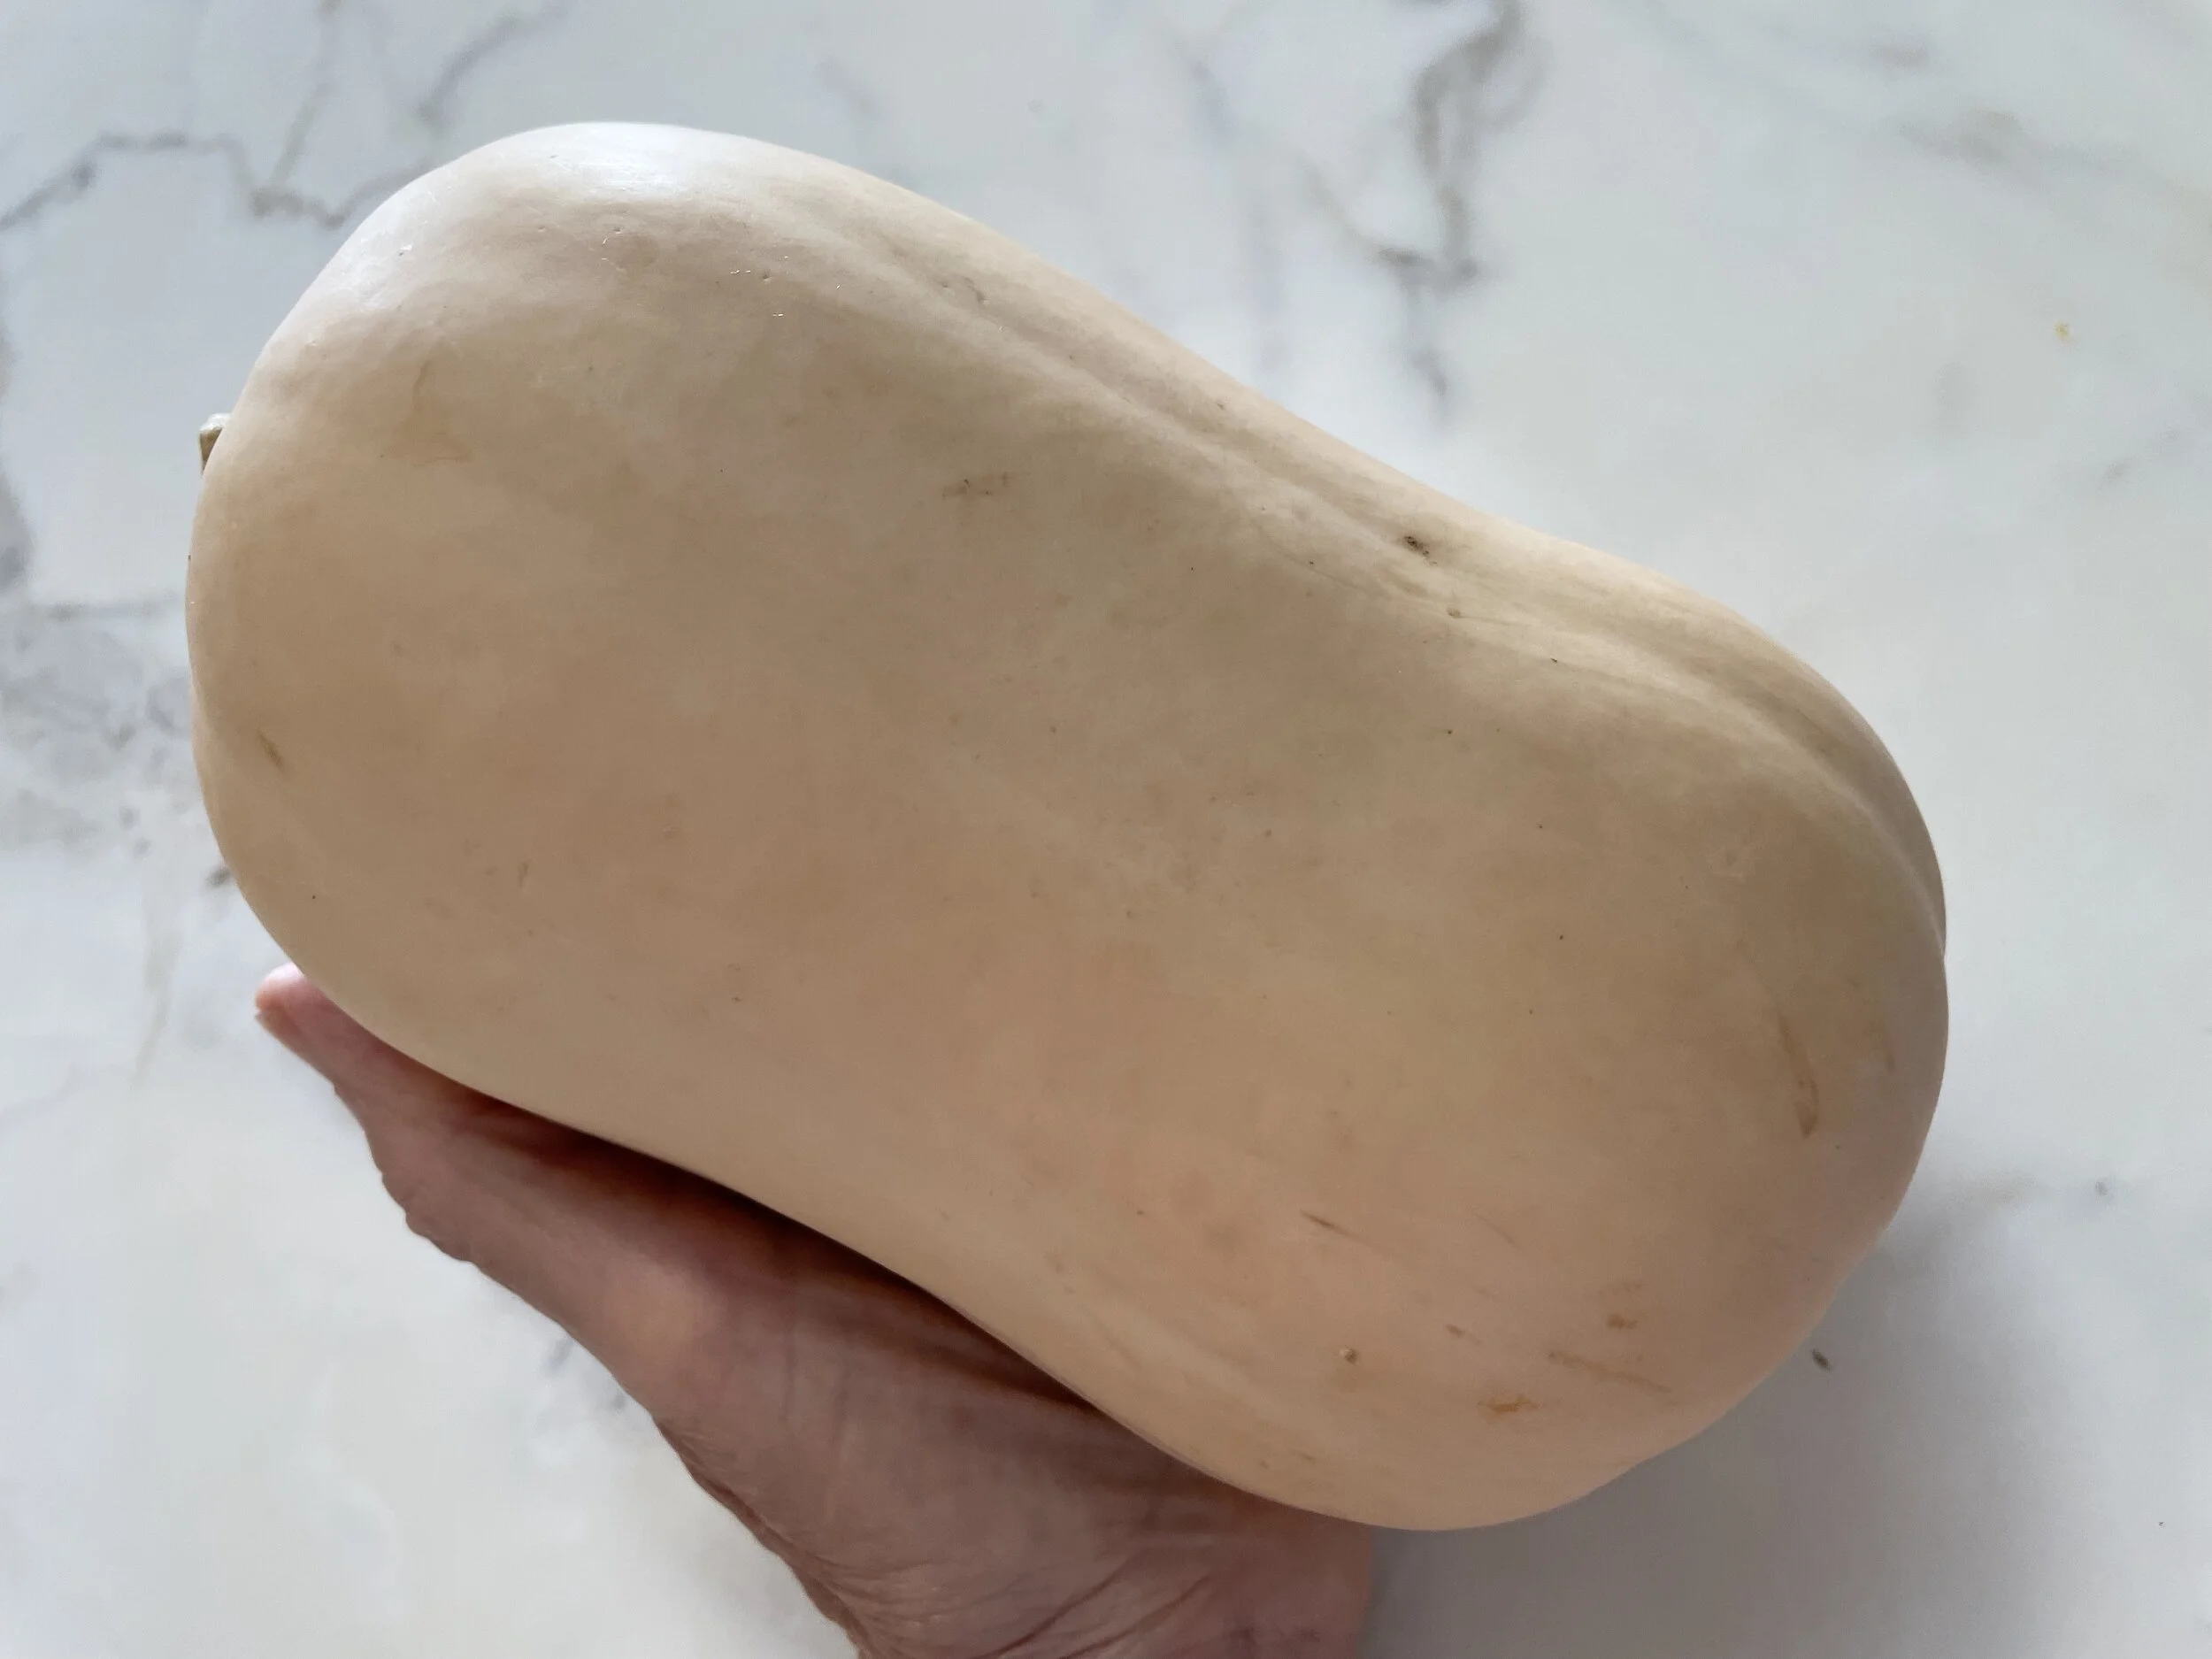
Home-Grown Butternut Squash

Home-Grown Butternut Squash

Here is a recipe to herald in fall, Roasted Butternut Squash Salad. Butternut squash is one of my favorites, and I use it a lot in the fall. I have been composting with my kitchen scraps for years, adding my finished compost to my soil and my plantings. A fringe benefit of this each year, is many happy volunteer butternut squash vines that sprout, flower, and yield tasty butternut squash for my fall menus.

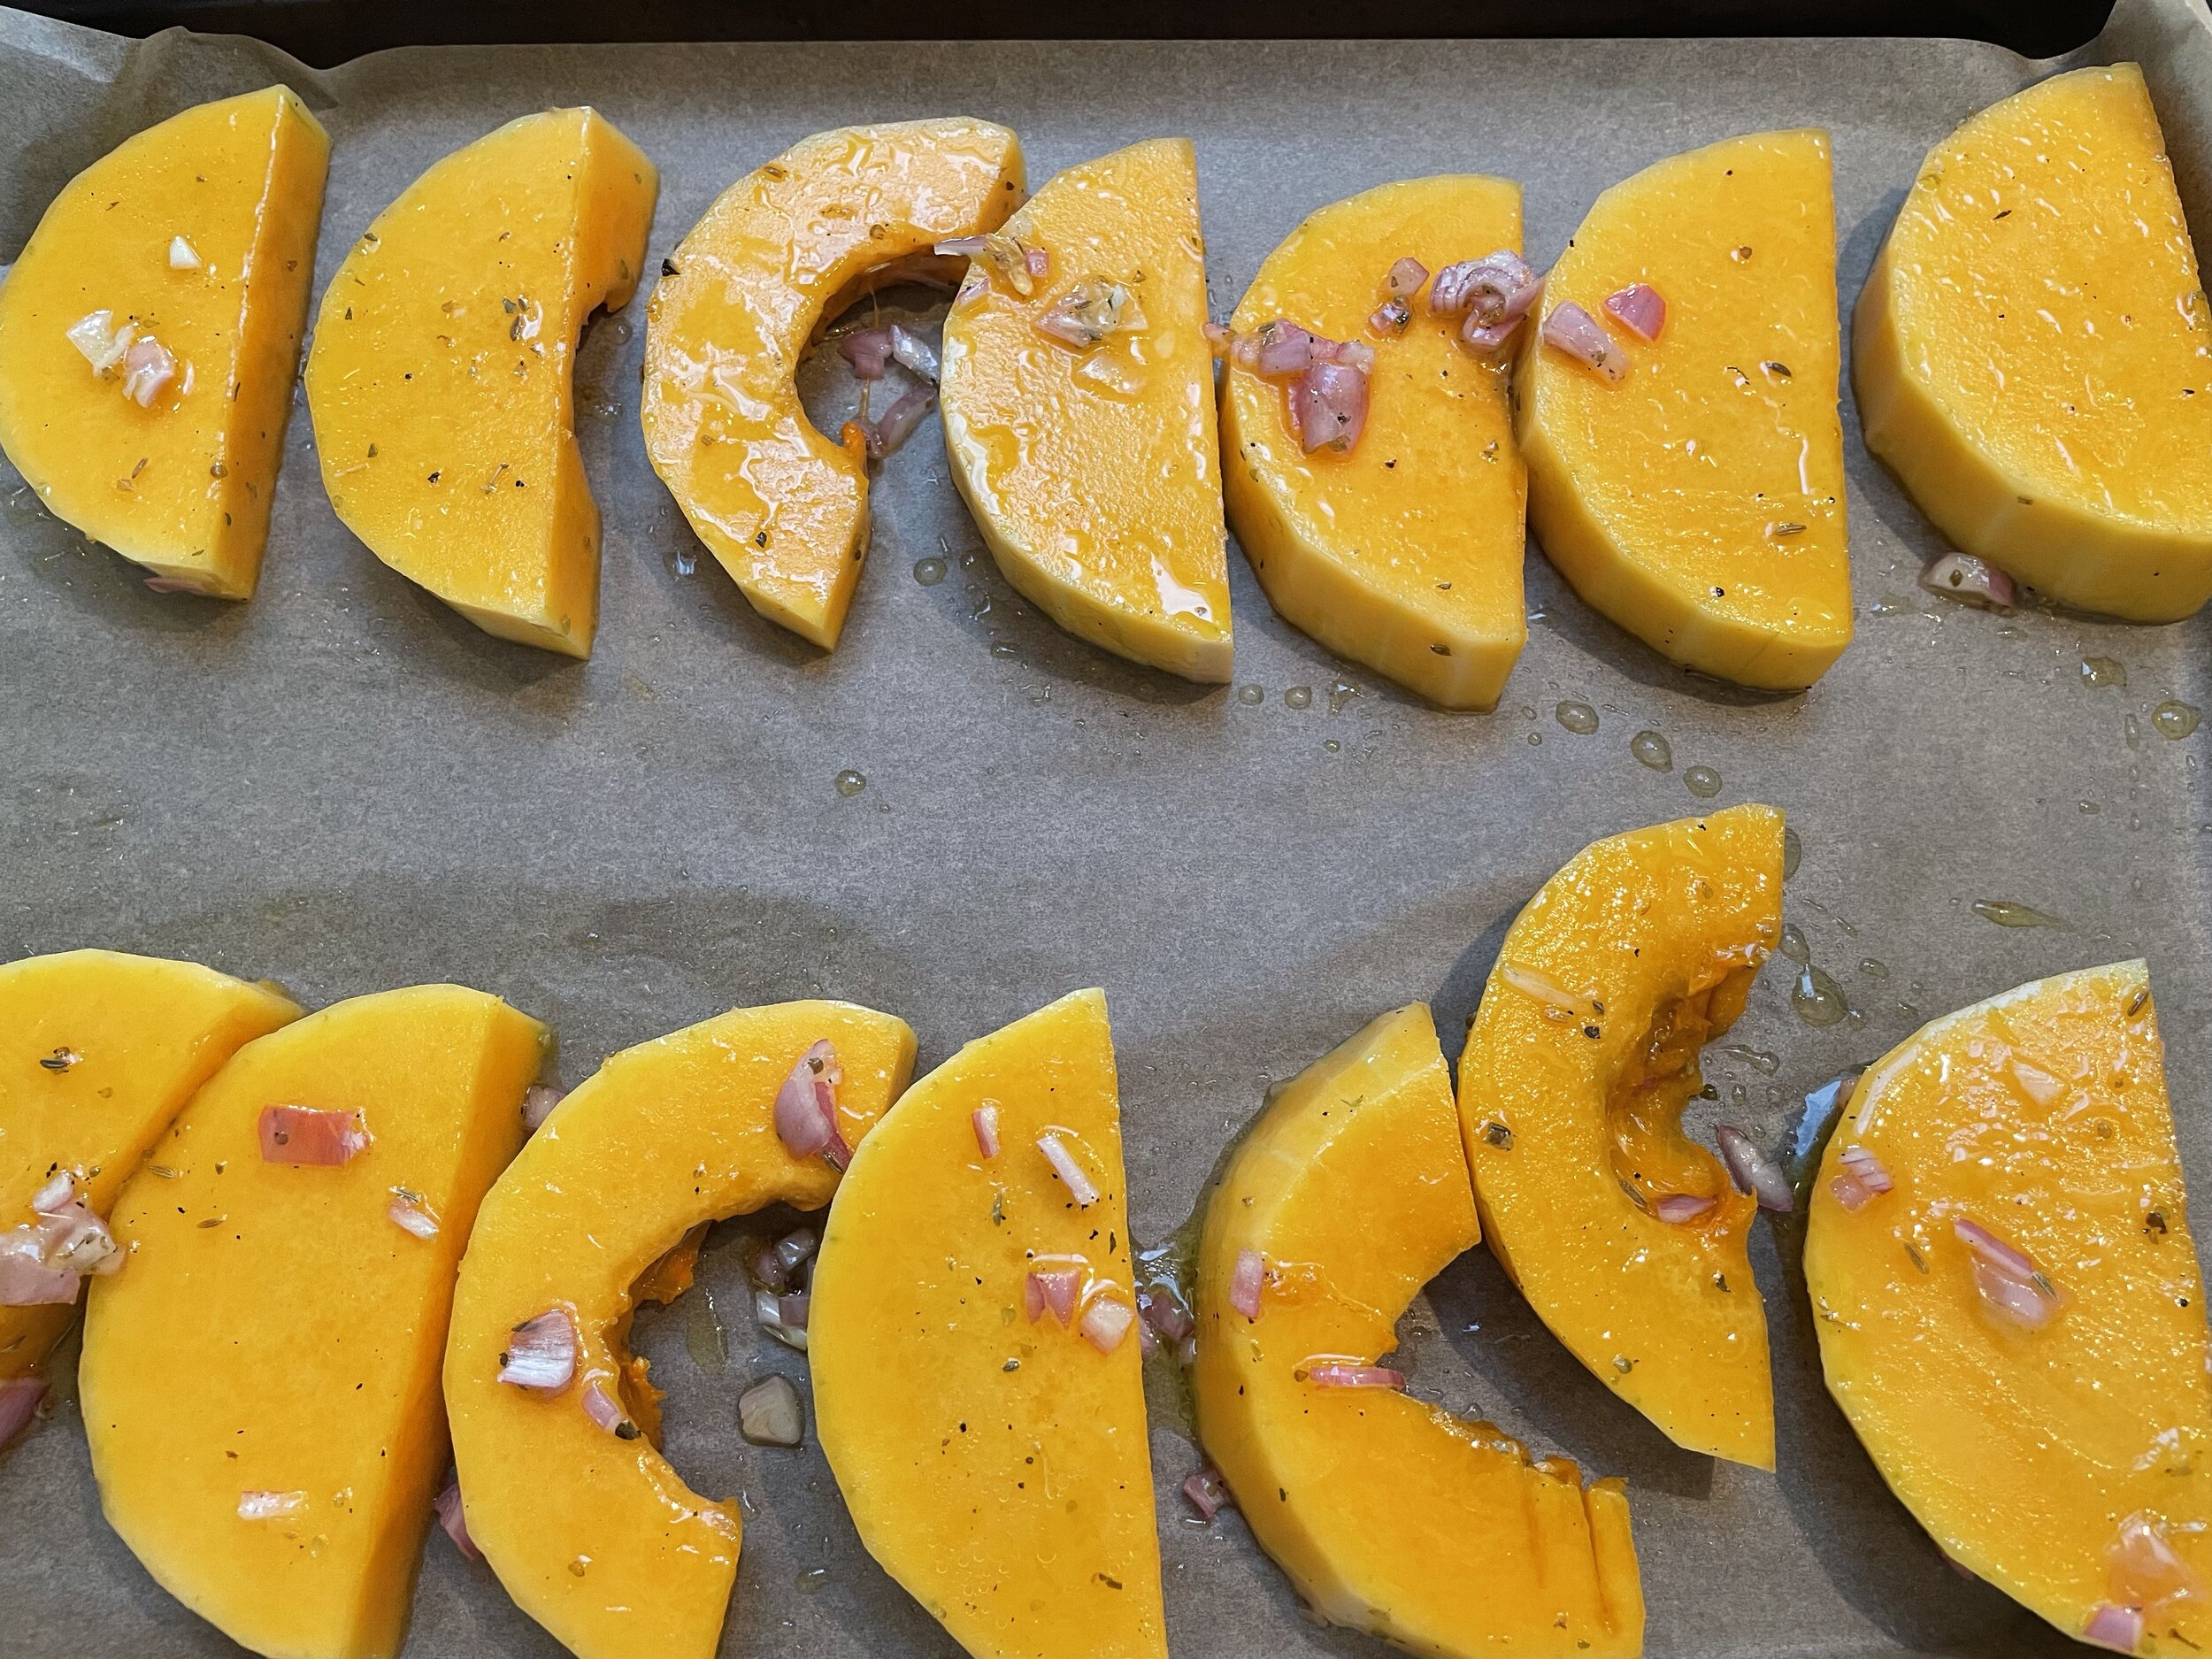
Butternut Squash Ready for the Oven

Butternut Squash Ready for the Oven

The beauty of this recipe is roasting your peeled and sliced squash with a sherry vinaigrette and finely chopped shallots until caramelized, and then tossing the remainder of your vinaigrette over your salad greens repeating the delicate flavors.

Ingredients:

1/4 cup extra virgin olive oil

1/4 cup sherry vinegar (preferably Spanish Jerez), or apple cider vinegar

1 small shallot, finely diced

2 teaspoons chopped fresh oregano, or 1 teaspoon dry oregano

1 teaspoon fennel seeds, crushed in a mortar & pestle

1 teaspoon honey

1/2 to 1 whole medium butternut squash, peeled and sliced into 1” slices, or cubed, depending on how much squash you would like to use.

12-14 ounces of fresh baby spinach, or mixed fall greens

1/2 cup crumbled French feta cheese, or more if desired

1/4 cup toasted chopped pecans (optional)

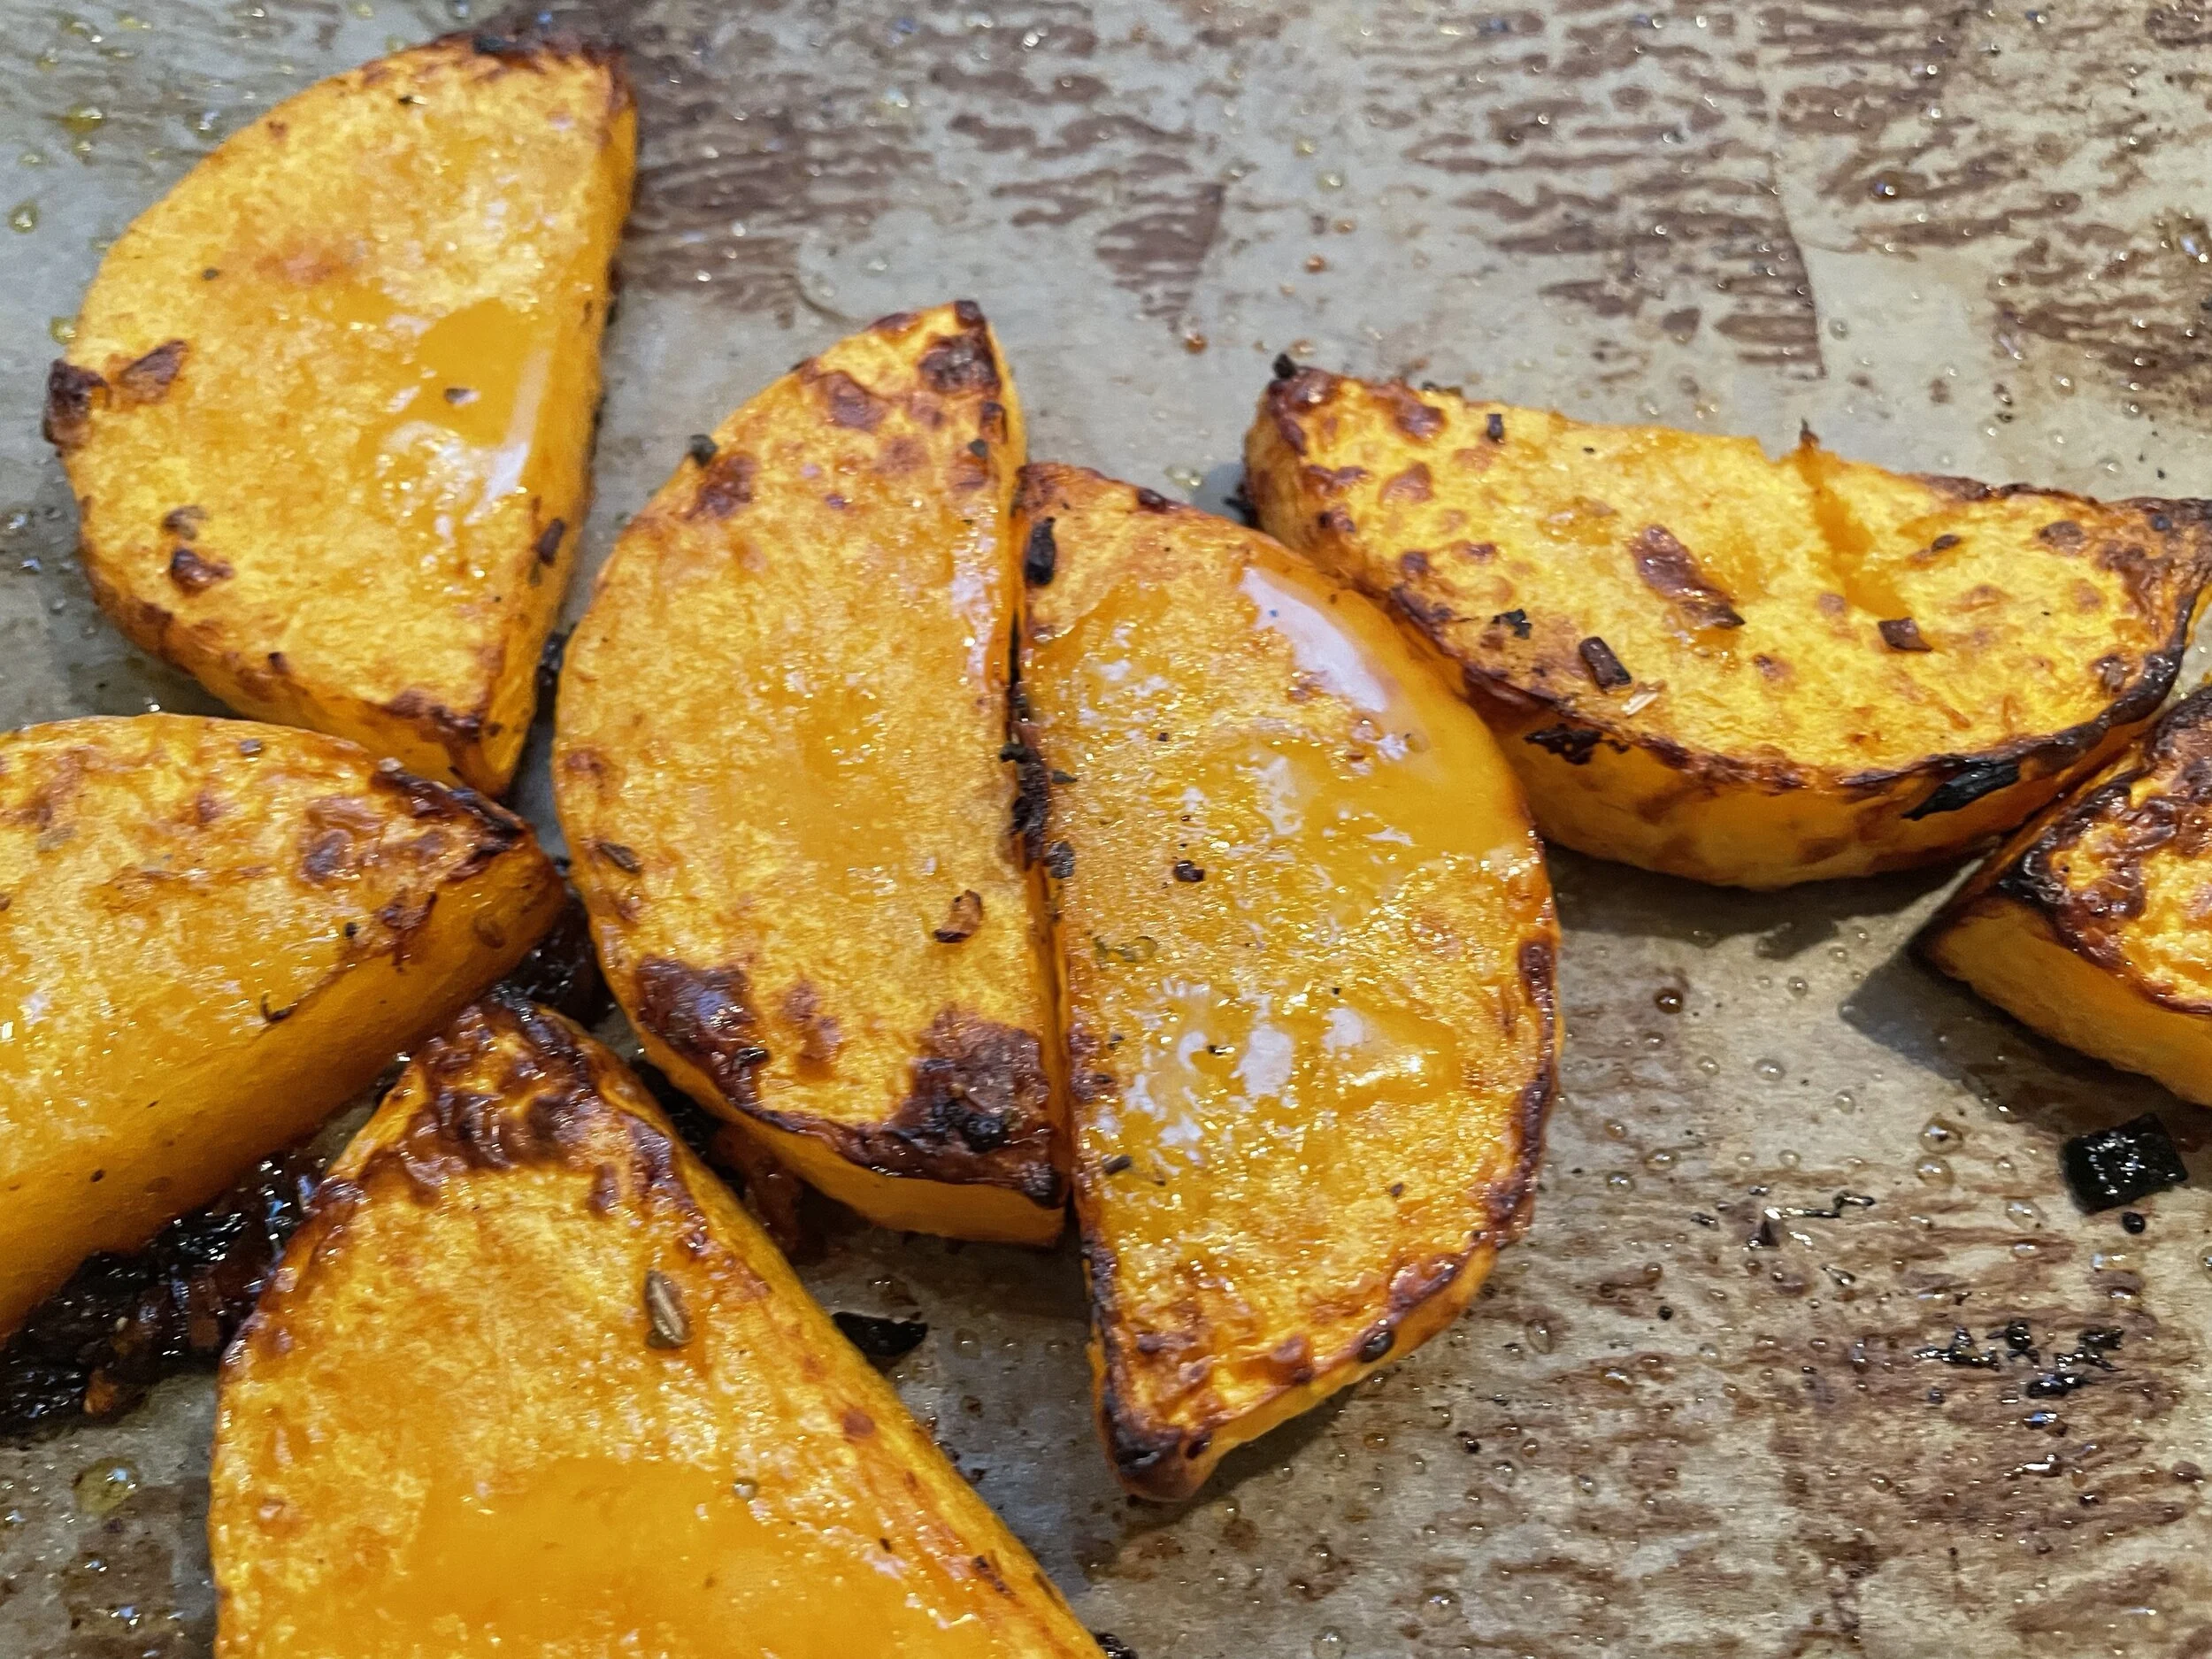
Roasted Butternut Squash from the Oven

Roasted Butternut Squash from the Oven

Directions:

1) Preheat your oven to 400 degrees F. Make vinaigrette in a small bowl whisking together olive oil, vinegar, shallot, oregano, fennel seeds, honey, 1/2 teaspoon salt, and 1/2 teaspoon freshly ground black pepper.

2) Place parchment paper on a large baking pan or tray. Toss squash in a bowl with 2-3 tablespoons vinaigrette. Bake squash uncovered, 25 to 30 minutes until it browns and begins to soften. Flip squash once or twice while baking. When finished, let cool.

3) Place spinach or greens in a large bowl. Add squash. Toss with remaining vinaigrette. Plate your salad with greens and squash. Top salads with crumbled feta cheese and toasted pecans. Makes 6 to 8 servings. Enjoy!

Composed Salad Ready for Topping with French Feta Cheese and Toasted Pecans

Composed Salad Ready for Topping with French Feta Cheese and Toasted Pecans

Please let me know if you make this salad, and how you liked it. I would love to hear from you.

Bon Appétit et Bon Weekend…..Bonnie

Sweet and Spicy Grilled Vegetables with Burrata
Melissa Clark’s Grilled Vegetables with Burrata Recipe

Melissa Clark’s Grilled Vegetables with Burrata Recipe

Are you “knee deep” in zucchini from your garden about now, and have exhausted your zucchini recipes? Melissa Clark’s Sweet and Spicy Grilled Vegetables with Burrata featured last May in The New York Times, might be a delicious solution. The beauty of this recipe is you can use just about any seasonal vegetable you like. Fresh green zucchini and yellow crookneck zucchini sliced diagonally is an excellent choice, as well as fresh asparagus, carrots, cherry tomatoes, and eggplant. Recipe Note: If using a dense vegetable such as carrots or corn, be prepared to grill them longer than your other softer vegetables. I chose to leave out the corn on the cob, mushrooms, and red peppers, and made my own medley of seasonal vegetables on hand.

What makes this recipe extra fabulous is not only all the lightly grilled fresh vegetables, but the “Sweet and Spicy Sauce.” Looking at the sauce ingredients you might think, wow, this is a potent sauce with chopped raisins, honey, apple cider, fish sauce, and red pepper flakes. The beauty of this sauce is that it really cuts the vegetables, and really adds a nice acidic accent and brightness to your vegetables. The complementary cheese on the side, also cuts the spicy sauce well. I have made this recipe using burrata and also mozzarella. Both worked equally well with the grilled vegetables. Enjoy!


Sweet and Spicy Grilled Vegetables with Burrata

Lovingly Adapted from Melissa Clark, The New York Times

Makes 6-8 Servings

Sauce Ingredients:

1/4 cup chopped raisins, preferably golden, or substitute dried apricots

2/3 cup white wine vinegar or cider vinegar (I prefer a combination of both)

2 tablespoons honey, plus more to taste

1 tablespoon fish sauce or colatura (optional)

1/4 teaspoon red pepper flakes

Pinch of fine sea salt

For The Vegetables (Use Any Or All):

Extra virgin olive oil

2 to 3 bell peppers, quartered, stems, and seeds removed

1 to 2 zucchini or crookneck yellow squash sliced diagonally 1/2-inch thick

1 small eggplant, sliced diagonally 1/2-inch thick

2 to 4 ears yellow corn, shucked

8 ounces mushrooms, washed, dried, trimmed and halved, or quartered.

1 bunch thick asparagus, ends snapped

8 ounces cherry tomatoes preferably still on the vine, ( I put the tomatoes on a wooden skewer).

For Serving:

2 small burrata or fresh mozzarella balls, or 2 cups fresh ricotta

Flaky sea salt and freshly ground black pepper

Basil or mint leaves, for serving

Crusty bread slices

Directions:

1) Make the sauce: Put raisins or apricots in a small heatproof bowl. In a small saucepan, combine vinegar, honey, fish sauce or colatura (if using), red pepper flakes, and salt. Bring to a boil, then let simmer until the mixture reduces slightly, about 3 minutes. Immediately pour over the raisins and let cool. Taste and stir in a little more honey if the sauce is too harsh. (Sauce can be made up to 1 week ahead and stored in the refrigerator).

2) Prepare the vegetables. Lightly brush olive oil on boths sides of sliced and other vegetables. Have a serving platter ready.

3) Grill the vegetables directly on the grate of the grill, in batches if necessary, and turning them as needed. Move them around the grates so they cook evenly. Cook until lightly charred, watching them carefully, 5 to 12 minutes or more depending on what vegetables you use. If necessary, use a grilling basket for the asparagus and mushrooms. Cherry tomatoes grill 1 to 2 minutes, and will start to burst and char slightly. Transfer all the vegetables as they cook directly to the serving platter.

4) Add the the cheese to the platter next to the vegetables. Immediately drizzle everything with some of the sauce, stirring it up to get the raisins, and with olive oil. Sprinkle with flaky sea salt, pepper, and scatter the herbs generously on top. Serve the extra sauce on the side, and the bread for making crostini with some of the vegetables.


Bon Appétit et Bon Weekend…..Bonnie


Tomato Tune Up

Tomato Plants Growing Near Potting Shed

I missed the boat on sowing tomato seeds this past February. I did have the chance to round up all of my volunteer tomato seedlings coming up from compost use throughout the garden and transplanted them all in raised beds in my potager. Interestingly, most of these volunteer tomato seedlings are Roma tomatoes.

Green Thumb Nursery in San Marcos, California always has a nice selection of tomato and vegetable seedlings in six packs late spring into summer. I bought six packs of Celebrity, Early Girl, Cherry Red, and Cherokee Purple. Much more than I usually plant, but this year I really wanted to have an abundance of tomatoes.

Out of room in my potager, I planted the six pack seedlings in a row near my potting shed, using a curly rod for support that I initially saw in Provence, Tomato Staking Technique. I haven’t looked recently, but I got my stakes at Dixieline Lumber, and I have seen them at Home Depot. As my tomato plants grow I wrap them carefully around the stakes, and also use gardener’s green tape for more security. For irrigation, and with my sandy soil, I installed a versatile 1/4” soaker hose, you can find at Home Depot, which has worked well.

Back to Basics.

1) Fertilize your tomato plants when they begin to flower, and monthly or more thereafter. I use GroPower Plus fertilizer, available at local Grangetto’s.

2) Water your tomato plants to 1” deep, and as frequently needed, if you have sandy or clay soil. Do not let your plants dry out and wilt, and do not over water when summer hot spells hit.

3) Tomato plants thrive with heat and sun, at least 6 hours or more. If you are coastal, tomato plants don’t really like ocean breezes and benefit from a protected sunny spot around your home that shields your tomato plants, possibly incorporating a house wall or fence. My west hedge and macadamia trees give my row of tomato plants some shielding.

4) Keep your tomato plants cleaned up, off of the ground, and opened up for air circulation and sunlight.

5) Indeterminate tomato varieties have a vining tendency. They can produce fruit until the plant is killed by frost. They bloom, set fruit, and ripen fruit all at the same time. These varieties need staking, and attention to removing suckers off of their main stem.

6) Determine tomato varieties are also called bush type, and are compact in form. They stop growing when fruit sets on their top bud. Their crop ripens all at once within a two-week period, and then the plant dies off. Ideal for use in containers, and don’t require staking, or pinching, and trimming of suckers.

7) Heirloom tomatoes or open pollinated varieties are generally considered 50 years or older, produce a true seed every year, and are known for their outstanding tomato flavors.

8) Hybrid tomato varieties are created from seeds produced by different plants that were crossed with each other to obtain certain desired characteristics. These varieties will not produce a true seed, and sometimes these tomatoes are considered to be slightly inferior in flavor and texture.

Years ago I interviewed Del Mar landscape designer, Linda Chisari, who is well known for her vegetable and tomato growing finesse. Linda back then grew over 30 different tomato varieties each year and shared, “the ones that do best for me are varieties that tolerate cool, overcast summer weather.” Linda’s “short list” then, was Juliet and Enchantment for eating fresh or in sauces. Green Zebra for it’s slightly acidic flavor and appearance. Dona, a small yet delicious French variety. Carmello for fabulous taste and appearance. Celebrity is a large flavorful tomato, and great when our summers are warm. Sun Gold, an outstanding orange cherry tomato. Of course, San Marzano for making sauce.

Growing tomatoes is all about preferences. What tomatoes you like to grow, and for what culinary purposes. Where you live and grow your tomatoes, be it coastal or inland, in the ground or in containers. How you prefer to support your tomatoes in your garden. Tomatoes are one of summer’s best experiences, sun-ripened mouth watering homegrown tomatoes, you won’t want to miss out on! Thyme for tomatoes is just around the corner.

Please share your favorite tomato varieties, and how you like to grow them.

Bon Appétit and Bon Weekend….Bonnie

Kitchen Garden Inspiration
The Kitchen Garden at Allt-y-bela in Wales, Garden Design 2012 Magazine

The Kitchen Garden at Allt-y-bela in Wales, Garden Design 2012 Magazine

From my post last week, Down The Garden Path, followers were asking me where I got my willow fencing. I thought it might be fun to revisit the original post and my original kitchen garden inspiration from photos and the Garden Design article. I hunted “high’ and “low” to find willow products, and finally found them at Master Garden Products in the Pacific Northwest. I actually called them as I had several questions and needed more information to make my order. Master Garden Products couldn’t have been more helpful and so friendly. I highly recommend the company and their products.

Now is a great time to get your gardens plans in place, make an order, and enjoy the beauty of willow!

Bon Appétit et Bon Weekend…Bonnie

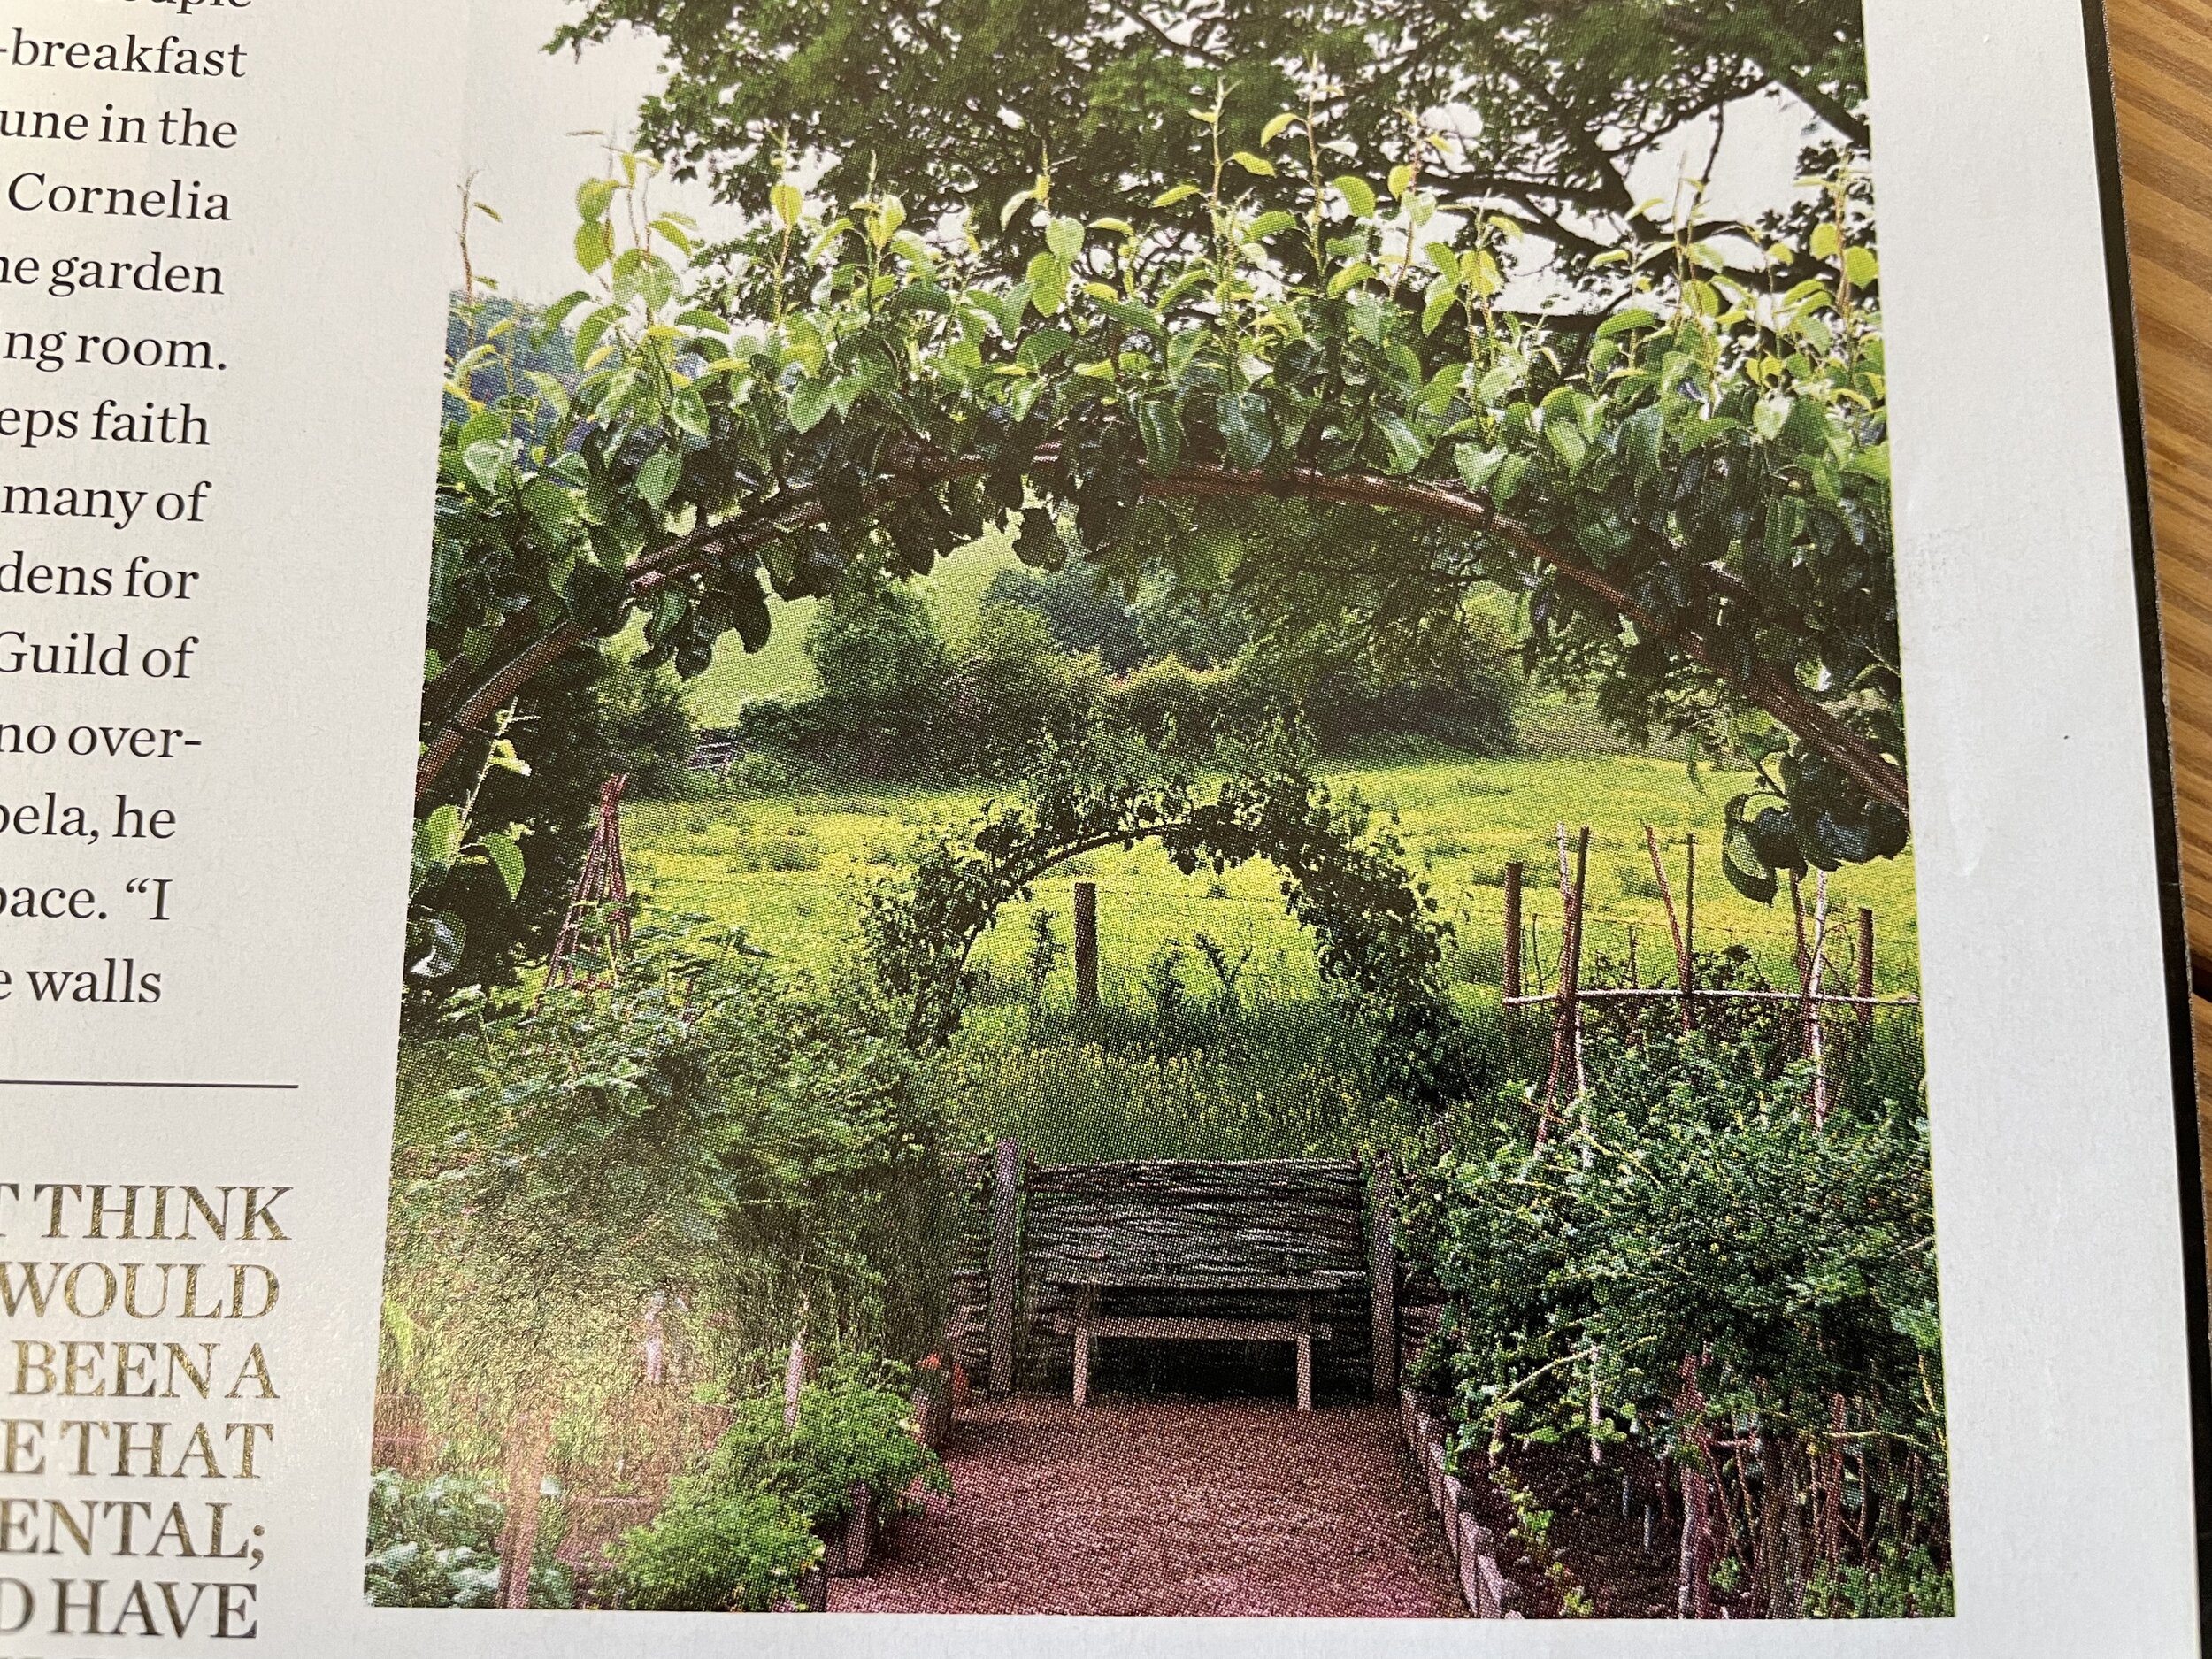
The inspiration for my kitchen garden, or potager, came from a Garden Design, Winter 2012 magazine article, Simplicity Rules, on well-known garden designer, Arne Maynard’s rustic and historic late medieval farm, Allt-y-bella. Located in Wales, much of the rustic gardens and garden structure remind me of Provence. I envisioned borrowing a lot of the main elements featured in the article and photos, creating the look of a rustic kitchen garden. Some of these elements that caught my interest were the wattle hazel fencing, arching fruit trees with a centered bench, raised beds for vegetables, obelisks for climbing vegetables, easy pathways around the raised beds, and select spots for larger perennial plants like rhubarb and artichokes.

Allt-y-bela Kitchen Garden Pathway, Arching Fruit Trees, and Bench, Garden Design 2012

Allt-y-bela Kitchen Garden Pathway, Arching Fruit Trees, and Bench, Garden Design 2012

In 2015, I started creating a kitchen garden space to the north of our vineyard, with 4’ x 8’ raised bed kits. I looked high and low for hazel or willow wattle fencing for enclosing the kitchen garden similar to Allt-y-bella. I couldn’t find any source at the time. I needed about 75’ total. However, I happened to find a large amount of rolled willow fencing at Rogers Gardens at 50% off in an obscure sale corner. My intention for fencing the perimeter was to keep our chickens out of the kitchen garden as well as any random critters.

Up until 2020, my kitchen garden was good, and a work in progress. Over time, with sun exposure and high winter winds the willow fencing began to come apart and break down. This is common. I started looking for what I call wattle or willow fencing again.

My Kitchen Garden, June 2020

My Kitchen Garden, June 2020

Last month I found willow fence panels online at Master Garden Products. They offer a nice selection and sizes of willow fencing, panels, borders, obelisks, etc. They are out of the Seattle area, and will freight orders to you. I purchased 6’ L x 3’ H woven panels for my entire perimeter, and used the same anchoring rebar and metal stakes that were already in place. I am really pleased with the look, and the material overall. I also purchased three obelisks for climbing beans. The willow panels are stronger and sturdier than the rolled fencing, but will eventually break down over time.

My Kitchen Garden, May 2021

My Kitchen Garden, May 2021

Fine tuning the willow fence, I will put put larger rocks around the bottom of the fencing, to discourage critters from burrowing under the fence.

Starting an Outside Row of Perennial Artichokes

Starting an Outside Row of Perennial Artichokes

For more information and musing on how I create garden rooms from garden magazines, photos, and design ideas, please go to my previous post, The Making of a Garden Room.

French Fabulous! On Netflix, there is a new French subtitled drama series, Lupin. It is like a modern day “Houdini” Thriller series. Lots of twists and turns. Not only does it keep you on the edge, it is filmed mainly in beautiful Paris. Once you watch an episode or two, it draws you like a magnet. With two series completed, I see there is a third one coming.

Bon Appétit and Bon Weekend….Bonnie


Mediterranean Fava Bean Hummus
Fava Beans in the Potager

Fava Beans in the Potager


Fava Beans are a great spring vegetable, also called a Broad Bean, and somewhat like a Lima Bean. I grow my fava beans from seed each year, because you usually don’t see them in the market. It is best to start them in the fall, and come March or so, you are rewarded with these beautiful bean pods.

Fava beans are great in a spring pasta with lemon zest, spring soups, and even as a puree. I share with you one of my favorite ways to use fava beans in this Moroccan-style appetizer, Warm Fava Bean Hummus recipe, from Bon Appétit.


Warm Fava Bean Hummus

Lovingly Adapted from Chef Rafih Benjelloun

Makes about 5 cups

Ingredients:

1 pound shelled fresh fava beans

3-1/2 cups water

7 tablespoons olive oil, divided

6 large garlic cloves, peeled

5 teaspoons ground cumin, divided

1 teaspoon (or more salt)

2 teaspoons Hungarian sweet paprika

1 tablespoon fresh lemon juice

Warm naan or pita breads for serving

Directions:

Add 3-1/2 cups water, 4 tablespoons oil, garlic, and 3 teaspoons cumin. Bring to a boil over high heat. Reduce heat to medium-low. Simmer uncovered 20 minutes. Mix in 1 teaspoon salt. Continue to simmer until beans are tender and soft, stirring occasionally, about 50 minutes longer. Drain and puree in a food processor until it becomes a smooth hummus texture. Season with more salt and pepper, if desired.

Spoon puree into a shallow serving bowl. Mix paprika and two teaspoons cumin in a small dish; sprinkle over puree mixture. Drizzle with lemon juice, then remaining 3 tablespoons oil, if desired. Serve puree with warm naan or pita breads.

Recipe Notes: Puree can be made 1 day ahead. Transfer to microwave-safe bowl. Cool, cover, and chill. Rewarm in 2 minute intervals in microwave, stirring often, before serving.


More Related Posts from My Blog:

Fab Fava Beans

Do You Grow Fava Beans