Miracle in the Chicken Coop

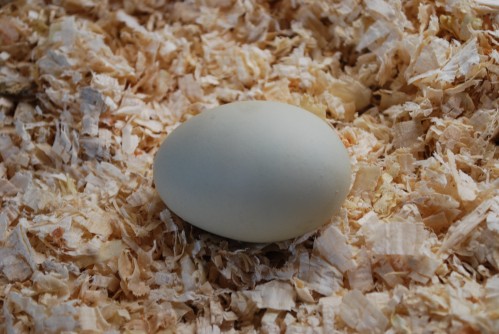
Miracle in the Chicken Coop Yesterday morning, I was opening up the shutters and door of the chicken coop for my hens to start their day, and I spotted a "miracle egg" in one of their nesting boxes. Miracle, because it was simply perfect in shape, size, and shell. Miracle, because it was a beautiful pastel blue-green colored egg, laid by Julia, my honey-colored Ameraucana hen. Miracle, because eggs are more of a rarity than the norm in our flock these days. Miracle, because Julia is a six-year old hen, hopelessly past her egg-laying prime, and please don't tell her. Miracle, because it is yet another sign of spring approaching, with increasing daylight lengths stimulating Julia to lay a perfect egg.

Fresh laid eggs are an incredible joy. One of the last things a hen does before she lays her egg is put a thin protective transparent coating over the egg. This locks in freshness, and you should never wash fresh eggs, except if they have gotten dirty with a manure dropping, mud, or something. This is nature's organic way of keeping the egg fresh. Once you gather your fresh laid eggs, you will want to put them in your refrigerator.

Fresh laid eggs, can still be warm from a hen's body, and warm in your hand. This is surely one of life's simple pleasures to experience, and reinforces my bliss in raising and growing your own food.

Some hens cackle a bit when laying an egg, confirming it is an in depth process for them. Hens laying eggs regularly, usually lay their eggs in the morning to early afternoon. When you provide nesting boxes for your hens, with fresh pine shavings or straw, hens instinctively know where to lay their eggs. Sometimes hens will lay all their eggs together in one nesting box, as if it were a party. More often, they use separate nesting boxes. Your eggs will keep fresh, and unharmed, until you collect and gather them.

Each chicken breed lays an egg of a particular eggshell color, that remains constant to that breed. For instance, a Rhode Island Red hen will only lay brown eggs. What a hen eats is the big difference in eggs, and determines the amazing color of their egg yolks and taste of their eggs.

There is such a dramatic difference in cooking, baking, and eating with fresh eggs, I am astounded. I have to smile at friends and family reactions when I cook them breakfast for the first time with our fresh eggs, or give a friend a dozen fresh eggs as a hostess gift.

Happy backyard hens who eat a protein laying mash*, enjoy fresh fruit and vegetable treats, as well as the pickings of a yard or garden for bugs and worms, will lay truly incredible "golden" eggs for you, your family, and friends to enjoy.

-Glossary-

*Laying Mash, complete diet for laying chickens, usually made up of cracked corn, soybean meal, oyster shell pieces, and other nutrients.

Pink Breath of Heaven

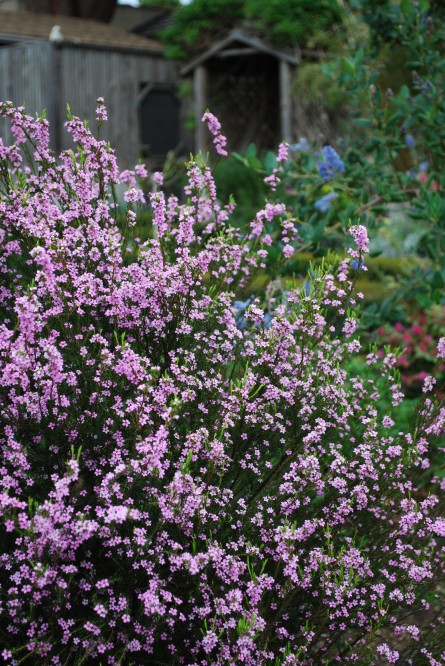
First Sign of Spring, Pink Breath of Heaven Blooming How can you not love a plant called "Pink Breath of Heaven". This shrub originally from South Africa, explodes into bloom winter to spring, with showy pink delicate tiny flowers on wispy feather-like branches. I feel like it is my own personal "trumpeter" in the garden, announcing the beginning of spring.
Pink Breath of Heaven, Coleonema pulchrum, can sometimes be found in nurseries under the name, Pink Diosma. There is also a white-flowered species, called White Breath of Heaven, Coleonema album, which is equally as beautiful in bloom and size. Pink Breath of Heaven likes full sun or partial shade, and moderate water. At maturity, it can easily become one of your largest evergreen shrubs in the garden reaching 5 feet high by 5 feet wide. It benefits by trimming it back, or lacing it if you prefer, after its spring bloom, to shape it and keep it compact. It does well in zones 7-9, and 14-24. Pink Breath of Heaven has a slight bit of fragrance when touched lightly, or brushed up against it.

Introducing this showy shrub into your garden, requires some thought on where to best place it for ample room to grow and thrive, and yet blend in with the rest of the garden. Pink Breath of Heaven look nice as a background shrub, as a focal point, or even along a pathway. For its size, it has a light and airy feeling to it, and it moves beautifully in a breeze.

Its delicate pink flowers are such a feminine and romantic pink, I like to use a visually complementary plant color palette such as dark pinks, purples, lavenders, and green colors surrounding it in the garden.

It is about this time of year, the end of February, in my zone 9 garden, my Pink Breath of Heaven bursts alive with its stunning first bloom and lets me know that spring is just around the corner.

The Joy of Chickens

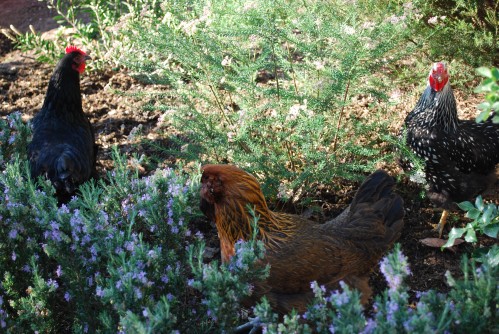
My Hollywood Girls, Louise, Julia, and J.Lo in the Garden In the photo above are my beloved hens, Louise, Julia, and J.Lo, named after the posh Hollywood crowd. Believe me, besides being pretty, they have attitude, too.
If you have the space, and are properly zoned to have chickens in your backyard or property, I would highly recommend jumping into the world of chickens. Chickens are so much fun, and relatively easy to take care of, and require just a few basics.

Chickens need protection.  They need a protection in the form of a building, pen, or coop, from extreme temperatures, winds, and drafts. They also need protection from elements that might harm them such as neighbor's dogs, hawks, coyotes, etc. Place straw or pine shavings on the floor, and keep clean. Ideally, it is nice to have a place of protection at night time and for extreme weather conditions, as well as an outdoor protected pen where they can be active.

Chickens need a source of water and feed at all times. Chickens need to eat constantly, and require "laying mash" in their egg-laying years. In fact, when I open up my chickens in the morning, and stir up their feed bucket, every morning is like Thanksgiving to them...they can't wait to get to the feed bucket after a night's sleep.  Every day I give my chickens a fresh treat consisting of greens, fresh fruit, or some type of vegetable. A fresh, clean water source is important for chickens to have at all times. I have two for mine, one that is inside their house, and one for their outside pen.

Chickens like a nesting box for laying eggs.  Chickens start laying their first egg at about six months old. Their egg production can be described like a "bell-shaped curve". Initially, once they start laying, they will lay an egg every 24 hours, or an egg a day. They will lay at that rate for their first 1-2 years, and they will gradually taper off, to the point where they do not lay any eggs. You can build a row of nesting boxes inside their chicken coop. It is an open square shape box, where straw or pine shavings is placed for bedding, and where the hen can go and quietly lay her egg. It is really quite an incredible process. Chickens naturally molt about once a year. Call it a vacation, or time of rest in sync usually with the decreasing day length. Do not be alarmed, they will lose their feathers, stop laying for a few weeks time, and then begin to grow back beautiful new feathers, and commence with the business of laying eggs once again. Fresh eggs are so beautiful and taste incredible. They are literally golden eggs.

Chickens like a roosting bar, 24-30 inches off of the ground to sleep at night. This bar assimilates a tree branch. They feel protected, and want to be off of the ground to sleep. I have a manure box with quarter inch wiring directly under the roosting bar, which catches most of their manure from the night before. Some people clean it once a week or less, but I collect their manure every morning, and put it in my compost pile. I like to avoid any problems like excess flies and odor that a build up of manure might cause.

A hen does not need a rooster to lay eggs. A hen does need a rooster if you are planning on having fertilized eggs, and eventually chicks for your flock. Baby chicks especially need to be kept warm and protected. Roosters introduce a whole different element to your flock, noise, and often they exhibit aggressive behavior protecting their hens. You might do yourself, and your neighbors a favor, and start with a flock of hens only.

Chickens are fun, social, and with individual personalities. Don't get just one chicken. They are social, so start off with at least 2-3 chickens. You can bet there will be a pecking order established within your flock, which is not necessarily a bad thing. Chickens love to explore, and are curious about everything. They love gardens, and will be a faithful garden companion. They respond to kindness, a routine, and familiarity of people feeding and caring for them. If you plan on going on vacation, etc., make sure you have someone reliable to watch and care for your chickens, just like you would do for your other pets.

If you have been thinking of getting chickens, spring into summer is your best time. Your local feed stores might carry a nice variety of "pullets", young laying hens, for you to choose from. There are certainly a wide variety of breeds available for the chicken enthusiast. I like brown eggs, and have found the heavy breed chickens, such as the Buff Orpingtons, and the Australian Black Australorps to be great egg producers, and "people" chickens. A fabulous website and place for information on different breeds and mail order of "specialized fowl" is www.mcmurrayhatchery.com.

I can not say enough about the "joy of chickens", you must experience them for yourself.

"Rainy Day" Green Tips

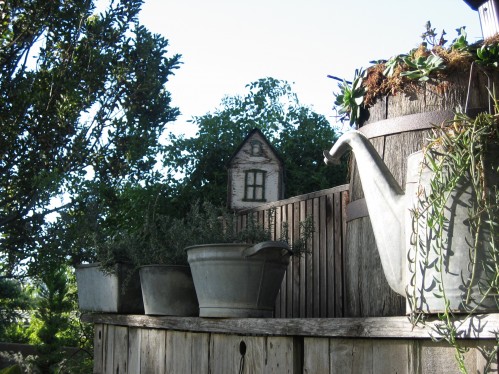
Can You Spot the Rain Barrel? Here in Southern California our average rainfall is twelve inches. With the looming cloud over of us whispering "water rationing" it is wise to take advantage of our precious rains. Why not try to collect, contain, and utilize your precious rain water for your garden. Here are six easy tips I use, that I would like to share with you.
1)  If you hear on the news of an incoming rainstorm or showers, turn off your irrigation water. The news has gotten quite accurate reporting on all the details of rain coming, enough to give you advance warning to prepare.    

2)  I have a compost bin, actually three to be exact, that I add to everyday and make fabulous "worm worthy" compost for my garden. That is another post subject on its own. They are stackable and have a removable lid. When I hear it is going to rain, I remove the lids from all of my compost bins to catch all of the rain and moisture. Compost needs to be kept moist, and what better way then a fresh rain. After the storm, I put the lids back on.

3)  Install an actual rain barrel or large urn under one of your convenient downspouts to collect water. In the photo, there is actually a plastic 33 gallon barrel within the beautiful wooden barrel, adorned with succulents on its top. My dear neighbor gave me this vintage barrel, that I slipped over a new plastic barrel. If you look closely you can see the downspout which is coming off of a storage shed rain gutter. I went one step further, and connected a hose at the bottom of the barrel with an on/off valve. The lath structure by the rain barrel is actually my potting shed. I have the ability to fill a watering can from my collected rain water barrel, inside my potting shed. It does not take much rain to fill a barrel. You will be surprised.

4) If you can not install an actual rain barrel of some type, put your watering cans, or something similiar under your rain spouts or gutters.

5) Place your easily moveable pots and containers out in the open air to receive the rain. Rain water has a lot of nutrients in it, that our irrigation water does not. Give your plants that extra boost.

6) Once again, when you hear rain. Prepare. Clean your bird baths, and empty them. The rains will fill them with fresh rain water and your wild birds will enjoy the treat.

I would love to hear your green tips for rainy days...in comments.

"Much Ado" in the Winter Vineyard

Backyard Vineyard in Winter A few months ago, I wrote a post called "Rest, Repose, and Replenish", the dormancy time in a garden during winter. This time of year has a different kind of beauty, and a peaceful mood beckoning everything to slow down and replenish. The same beautiful dormancy happens with a vineyard, too.
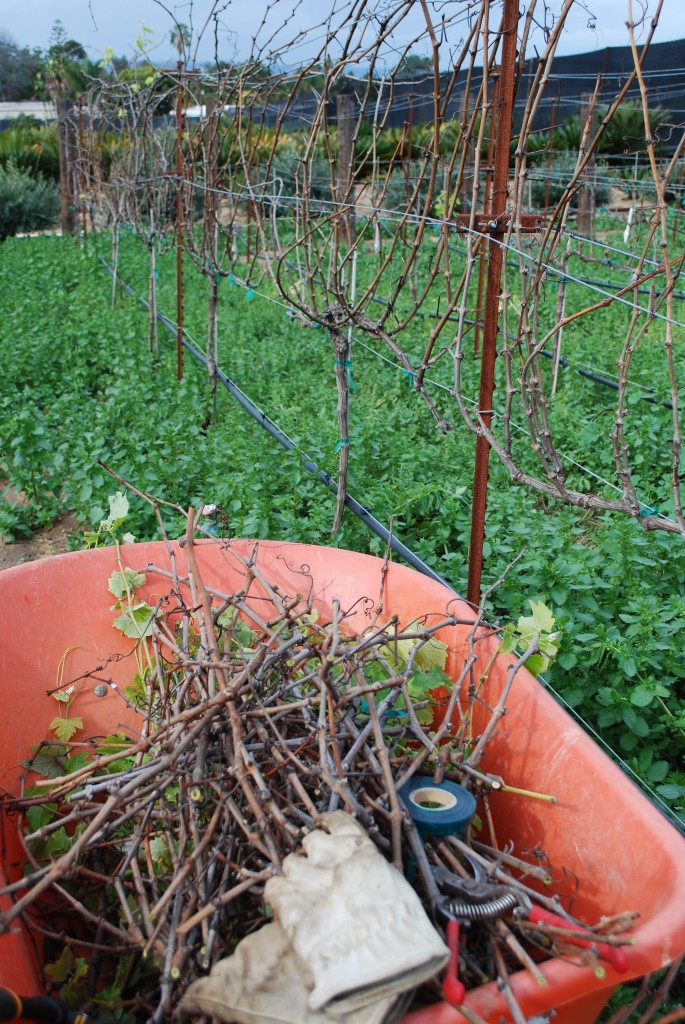
After the culmination of the grape harvest, the vines begin to slowly shut down. Their leaves turn a rainbow of autumn hues and eventually drop off the vine. The skeleton of the grapevine or "bones" is exposed, showing their trunk, cordons (horizontal stem-like arms), and their canes that have grown upright and been tucked carefully into the upper wire trellis.

There is "much ado" in the winter vineyard. For every vineyard, whether backyard or commercial, there are certain tasks within certain timetables over the calendar year which must faithfully be done to ensure a healthy vine and optimum grape growing.

We have a backyard vineyard which my husband, John, and I have named, Domaine de Manion or (DDM). We have about 300 syrah grapevines on 1/3 acre that are spaced 6 feet between grapevines and 5 feet between rows. Our rows are planted east to west to catch the natural cleansing of the Pacific Ocean's breeze one mile away. DDM is on a sunny western slope in sandy soil, on the 33rd Parallel. In 2009, our vineyard is beginning its fourth year.

The winter months of January and February begin the calendar year of tasks. The grapevines are dormant now, and show off their structure left from the previous year's growth. Winter pruning of each grapevine is done during dormancy and before bud break, the initial new leafing of the plant's beginning leaf and vegetative growth. Here in Southern California, pruning is usually done the beginning of February through mid-February, depending on the grape varietal you are growing and weather.

Pruning is a task that is done by hand, and rather carefully. There are different types of pruning methods used in vineyard management. At DDM, we use the "spur" pruning method, which keeps the established horizontal cordons or arms in place, off of the grapevine's trunk. Each cordon is further trimmed to approximately six spurs on each side. Each spur will renew itself, beginning at bud break, and grow a new fruiting shoot for this coming year's grape formation.

Pruning is an extremely beneficial tool in a vineyard for managing the growth and shape of your grapevines, managing your optimum grape production, creating a healthy balance between your vegetative growth to fruit production ratio, even delaying bud break if you are in a frost prone area, and physically removing any disease, if needed. Using a wheelbarrow we walk the rows, pruning and removing the grapevine clippings. The clippings are then bundled and recycled with our green waste.

This is also a time of close inspection for the health of the vines, cordons, trellis wires, end posts, and drip irrigation for anything a miss. It is important to to take the time now for close inspection as you can see everything so easily, and ensure the year ahead is smooth.

Weeds from our winter rains can quickly get out of hand fast, and need to be knocked down and away from the grapevines. Weeds can hold moisture and humidity close to the grapevines, which is not a good thing. In some vineyards, a cover crop is planted between the rows to keep the weeds down, and provide nutrients back in to the soil.

Each task now, and throughout the coming year will affect the growth and health of the grapevine, and the grape harvest this coming fall. Mother Nature will play a huge part with the amount of rainfall, daytime and nighttime temperatures, and overall weather. There might be unforeseeable events such as wildfires, winds, drought, and frost which will be a factor, too.

This is also a time of much anticipation, and optimism for the growing season ahead, and the rewarding harvest in the fall. It is a journey that the vineyard takes you through together, changing with each season.

"Majorca Pink" Rosemary

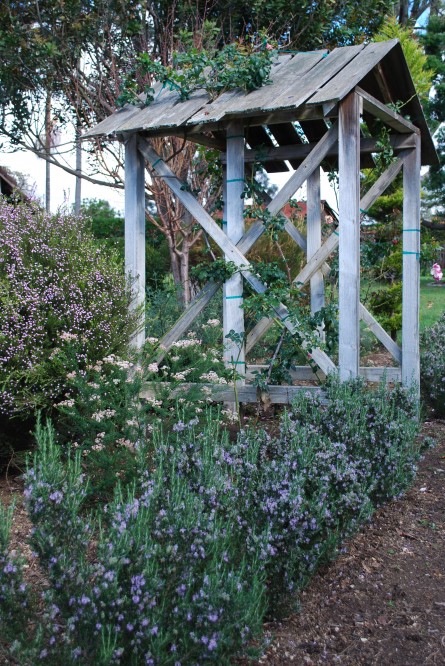
"Majorca Pink" Rosemary Hedge Let me introduce you to the "Majorca Pink" rosemary, Rosmarinus officinalis, "Majorca Pink", planted along the front edge of the arbor in the photo above . It is an upright rosemary which can grow 2-4 feet high, and 1-2 feet wide. It has pretty pink lilac flowers, with a hint of fragrance. Its flowers attract bees, birds, and butterflies. It blooms in the winter time here in Southern California, in my Mediterranean climate. Its flowers are edible, and can be used as a garnish. Its dark green, glossy, aromatic leaves are a great culinary herb.

I stumbled across this "Majorca Pink" rosemary, quite by accident, unknown to me until last year. I thought it might work for a hedge or border on the south side of my middle garden. It is a location with wonderful sandy soil, and good drainage. This spot also receives a lot of sun, and is dry.

I planted this hedge, with several 1 gallon "Majorca Pink" rosemary plants spaced about one and half feet apart. The same method you would use to start a boxwood hedge. Let the plants establish themselves first for a year, and then you can trim their tops slightly if they reach the approximate height you are desiring. After tipping their tops, their sides will eventually reach for each other in the form of a hedge. The "Majorca Pink" is very easy to care for, and I have just let it go, liking the shape and the hedge it is forming. This type of rosemary is very pretty laced, as well.

I have several types of rosemary woven throughout my garden, besides the "Pink Majorca", such as the "Tuscan Blue", "Prostratus" and "Huntington Carpet". There are many, many other types to discover, too. Search the internet or your local nurseries for different ones. You just might surprise yourself, I had never thought of using "Pink Majorca" rosemary as a hedge.

Think Outside the "Bloom"

Narcissus "Golden Dawn" in French Market Basket Narcissus "Golden Dawn" sitting pretty in home-grown oranges in a vintage French market basket. Make this spring arrangement easily and effortlessly. There is something about the citric acid in oranges which will sustain narcissus in bloom for several hours, and I found up to a day or two. Use fresh oranges.

Find fresh narcissus such as "Golden Dawn" which have a stiff stem. Sometimes, fresh cut "Golden Dawn" are sold at flower marts. I have seen narcissus "Golden Dawn" bulbs for sale on the internet. It is a great landscape daffodil, known for its beautiful petite yellow with orange-cup flowers, reblooming ability, and easy naturalization. If you are a fan of sweet peas, and grow them in your garden or have a source, sweet peas may be substituted for narcissus.

Think first, what type of arrangement you would like to create. Some ideas could be something for a table centerpiece, hanging on your front door, off your garden gate, or even by your patio door. Second, find your container. Ideally, you want something that will show off your oranges and and all of your bright spring color. I chose this French market basket, but you could use many containers. Spring is the season for baskets, maybe a charming wicker basket hanging on a front door, would be a good choice. Vintage baguette bread boards, either a single or several arranged across your table, could hold oranges easily for a cheery table centerpiece. Maybe a favorite glass bowl would do, the possibilities are endless

The next few steps are preparing your narcissus for their orange base, and assembling the oranges the in your container. Trim narcissus stems with a fresh diagonal cut, and keep your stems short. Use a pointed object, such as a wooden chopstick or knitting needle, and carefully make a hole deep enough to hold your stem upright in each orange. Insert your narcissus stem into the ready-made hole in the orange, and repeat till all of your oranges are finished. A small precise hole in your orange will keep your orange in tact, and not dripping. Experiment, and put two stems per hole with some of your oranges. You might want to leave some oranges, as I did, and use them as a base for your arrangement.

Try thinking outside of the "bloom" for a special spring occasion.

Hypertufa Trough Recipe

Succulent-Planted Trough Here is a simple recipe for making Hypertufa* Troughs. These beautiful troughs resemble the centuries-old stone troughs you see in Europe. The troughs are beautiful when potted, and because of their primitive style, are especially striking planted with succulents.  

"Hypertufa Trough Recipe"

1 part perlite or vermiculite 1 part sphagnum peat moss 1 part Portland cement 1 small handful synthetic fiber reinforcement material 1 part water, approximately Plastic bowls, shoe boxes, or a mold of your liking similar in size Soil to pot trough Succulents or other plant material

Put dry materials in a large container such as a wheelbarrow, in this order: 1 bucket perlite or vermiculite, 1 bucket peat moss (remove any large lumps or sticks), 1 bucket of Portland cement, and a small handful of loose reinforcing fibers (these are sold at masonry supply stores). Mix thoroughly. Add water in small increments and mix until the material is the consistency of dry cottage cheese or thick oatmeal. Don't let the mixture get too wet.

Line the inside of your bowls or shoe boxes with plastic bags or plastic wrap. Using a rubber glove, scoop handfuls of mixture and mold the inside of your containers. Form mixture around edges 3/4" to 1" thick. Poke 1-2 drainage holes in the bottom of the mixture with your finger, stick or dowel. Cover the mold well with plastic or place in a plastic bag for 24 hours.

After setting 24 hours, carefully remove the very fragile trough from its mold and peel off the plastic. Use a wire brush or a paint-scraping tool to smooth out any imperfections, and give the exterior a pleasing texture. The edges should be softened, rounded, and somewhat irregular.

Place the trough back in its plastic bag and let it cure for a couple of weeks. The slower it cures, the stronger the trough will be. Remove the trough from the bag and allow to air-dry for a couple of weeks longer. When completely dry, carefully move a propane torch quickly over the surface to burn off any reinforcing fibers that are exposed. The number of troughs which can be made from this recipe is dependent on your mold sizes. This recipe may be doubled and still fit in a wheelbarrow.

These troughs are great on outdoor tables, patios, or as a special gift to someone. This recipe is from dear friends, who like to have a trough-making party once a year.

-Glossary-

*Hypertufa---is a man-made rock substance intended to assimilate natural tufa, which is a form of porous limestone rock. It is created by mixing dry cement, perlite, peat moss, and water. It is used in rock gardens, and is quite effective as a plant container.