7 Elements Of A Potager

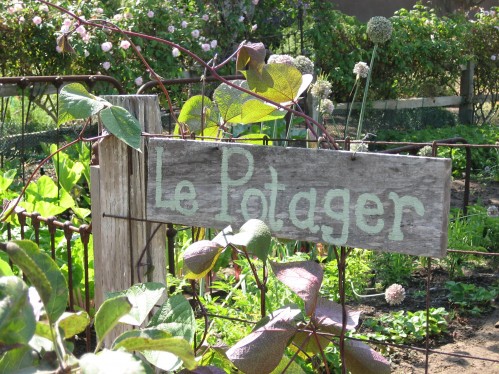
A Potager Changes With Each Season There are many different sizes and styles for a potager, or year-round kitchen garden. In fact, it is important to create a potager in your own personal style. Generally, a potager is a small plot, large enough to feed a family with daily fresh vegetables, accented by fruit and flowers.

Choose your site wisely. A potager is a permanent year-round growing plot which is functional, as well as beautiful. As the months roll into years, you will spend a lot of rewarding time in your potager. Enhance your personal potager by where you locate it, what you grow, how you enclose it, how you adorn it, and how you manage it.

There are many wonderful elements which embody a potager such as enclosure, pathways, borders, structure, order, chaos, beauty, small trees, garden ornaments, the intertwining of function and beauty, and the romantic mixing of vegetables and flowers rotating through their seasons.

Elements That Define A Potager

1)A potager is usually defined by some type of enclosure. Enclosure can be defined as walls, fences, thick hedges. Some of these enclosures can be a working surface for your potager, for espaliered fruit trees, support for tall plantings, and heat retention. Enclosure protects from competing critters and forces such as wind.

2)Pathways are important to divide your plots, create travel pathways, and working space to care for your potager. Pathways may be made of materials such as coarse mulch, gravel, bricks, cement, or even bare soil.

3)Borders can be of a permanent design, for instance growing a low boxwood hedge, a "wood box" edge, or a stone border. Borders may also echo seasonal plantings such as a marigold border, or ornamental cabbage. Like borders will create a formal design in their repetition.

4)Structure is the bones of your potager. Structure can be vertical in the shape of an arbor, small trees, a garden ornament. Structure is also walls, gates, and even terraces. Structure adds interest, and further defines the personal style of your potager.

5)Order versus chaos. You might prefer a very formal potager, set out with boxwood borders, and neatly confined rows of planting. Your potager might start out with order, and as it grows becomes chaos, or a more romantic mixture of vegetables and flowers. Or your plantings from each seasonal beginning may by more informal, such as planting wildflower seeds.

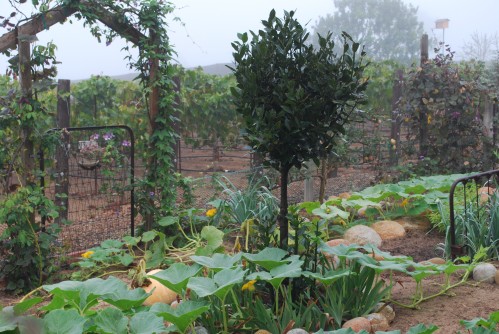
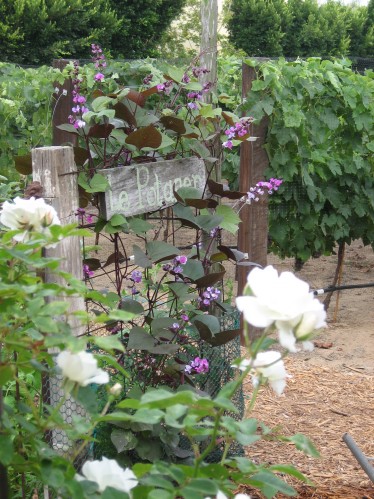
6)Center a focal point in your potager such as a small tree, garden ornament, urn, statuary. In my potager I have planted a bay laurel tree trimmed into a two-ball topiary. A focal point might also be an impressive artichoke plant, which renews itself year and year. More examples of possible focal points are a sundial, bird bath, obelisk, or a planted arbor.

7)Place a convenient tool shed or small building where you can keep all your tools, seeds, perhaps a potting shed, and your other potager resources at hand.

Divide your potager into plots, or if you have raised beds, begin dedicating each plot or raised bed with specific seasonal vegetables you would like to grow. Remember to plant your tallest plants to the north of your potager or in the back plots of your potager.

You can start your potager with any season. Whatever season you start with plant about 2/3 of your potager, and leave 1/3 free to be planted later. For example, create a 9' x 12' plot. Divide your plots in to four rows of three plots each. Begin your potager by planting 9 of your plots, leave three of them empty. Another example, if you have 4 existing raised beds, plant 3 with seasonal vegetables, and leave 1 free to start planting when appropriate for the next season.

Eventually, your potager will slowly move into the next season, as your vegetables mature, are harvested, each plot is tilled, and replanted for the next season. Remember to keep a portion of your potager empty in anticipation of the next planting season. It will take a while to get the "ebb and flow" of it. Eventually, your potager will become fluid.

Everyone has their own timing with the four seasons and climate-specific vegetables, fruits, flowers, and herbs they can grow. Adapt your plantings to your own seasons, and your own preferences. Classic perennial favorite herbs for a potager include rosemary, thyme, oregano, marjoram, and tarragon. Other classic plantings for a potager might include strawberries, melons, annual herbs, espaliered fruit trees, and then of course, the rainbow of seasonal vegetables.

Do you have a potager now? How do you plant and manage it? What is unique about your potager?

Grow Your Vegetables Year-Round

The Humble Potager Do you wish you could extend the "fresh vegetable concept" of summer throughout the year by growing your vegetables year-round. Well, you can, and it is much easier than you think. It is an age-old concept borrowed from the French, called the "potager" or literally translated "soup garden".

In France, a potager may be very formal and considered a jewel on an estate or situated on the succinctly elaborate grounds of a chateau. A potager may also be very humble, next to a small farmhouse in the countryside, by railroad tacks in the suburbs, or in urban plots outside a nearby town. Wherever they are located or however they are designed, they have been a foundation for French food culture, and the French tradition of eating seasonal fresh foods.

A potager is a French-style kitchen garden composed mainly of seasonal vegetables and herbs. A potager may also include a few fruit trees, and even seasonal flowers. The sole purpose of a potager is to provide a year-round supply of fresh daily produce for a family or a small group of people. It is usually a small and manageable plot of 10' x 10', or 9' x 12' in size.

A potager is divided up into plots that are individually managed and rotated as the seasons unfold each year. It requires some planning, management, knowledge of your specific growing seasons, and knowledge of what you are growing, on your part to be successful with a potager.

In America, generally speaking, our traditional backyard vegetable garden consists of planting the garden in the spring, reaping fresh produce over the summer, and sometimes utilizing the abundance of the harvest by freezing or preserving for use over the winter, or for another time.

Americans, unlike the French and other Europeans, do not normally have a vegetable garden year-round. This might be changing now. One of the hottest food trends today is "growing your own vegetables". Gardeners such as yourself, want to keep the "fresh produce concept" alive after the summer has waned. We all know that fresh strawberries out of a morning garden for breakfast, or fresh green beans harvested still warm from the sun, are a delight to the senses and incomparable.

We are also being influenced by active local organic farms supplying restaurants and farmer's markets with new and exciting types of produce to explore and enjoy. Their underlying message is "eat locally".

This is an introduction to the concept of the "potager". Follow along as I discuss further the elements of the potager, how to implement a potager, how to manage, and what you might want to plant throughout the four seasons in your potager. For a related post on vegetable gardening basics at VintageGardenGal see, 7 Basic Steps of Successful Vegetable Gardening.

Do you have a potager now? Where did you first see a potager? What is your motivation for vegetable gardening year-round?

Seek Containers With A Past

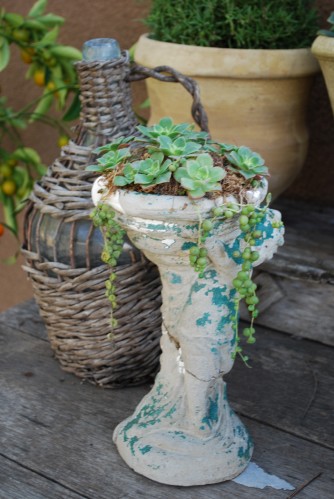
Vintage Cherub Planter Charms I love finding great vintage containers with a past. They have a history, the intrigue of previous owners, time-worn patina, and usually multiple imperfections. All of which create an incredible charm and uniqueness.

One of my favorite pieces in my garden is this tiny charming cherub statuary, diligently overseeing her thriving succulent planting of echeveria and string of pearls. She might also hold a candle glowing with a soft romantic light, or some sweetly-scented dried lavender. I have a lot of cherubs in my garden, for a touch of femininity, and maybe to evoke a certain mystique.

This sweet little cherub was once a fecund green, now muted and disappearing in places. She was broken at one time, and someone cared enough to mend her. I purchased her back east, so she has journeyed far. She definitely has a past, and now she has a present and an ongoing future.

Don't overlook these types of vintage container treasures as they can add oodles to your garden charm with their simplicity and sheer survival. Best places to find these vintage container treasures, is often where it is most reasonable. Seek out your local flea markets, thrift stores, garage sales, alley dumpsters (no kidding), barn sales, and favorite garden antique shops.

Please comment if you have a vintage container treasure that makes a statement in your garden? You believe that one person's discard, can be another persons' treasure?

Bay Laurel Tree

Early Morning In Potager, Bay Laurel Tree Centerpiece Everyone should have a Bay Laurel Tree in your garden, if you are in zones 5-9, and 12-24. There are as many uses for this tree and its green glossy aromatic leaves, as its many names. The names Bay/Sweet Bay/Laurel, Laurus nobilis are all the same tree. Sweet Bay is currently enjoying recognition as the 2009 Herb of the Year, as chosen by, The International Herb Association.

The Bay Laurel Tree is a Mediterranean evergreen shrub or tree. It is a slow grower but eventually can reach 12-40 feet in height. Fortunately, it responds well to trimming and can be shaped into a desirable topiary form. A few years ago in my potager, or kitchen garden I planted a Bay Laurel Tree in the center and as a focal point. I have shaped it into a sphere on top, and am presently shaping a smaller lower sphere closer to the ground. Bay Laurel trees take full sun or partial shade and appreciate moderate water.

Bay Laurel leaves are really desirable for decorative use in a wreath or crown, and as a culinary use in many types of recipes, and the well-known "bouquet garni". It also has household, cosmetic, aromatic, and medicinal uses.

"Bouquet Garni" is a french term for a bouquet of fresh herbs, tied together with kitchen string, and generally allowed to dry before steeping in stews, soups, sauces, stock, marinades, and the like. Typically, fresh herbs are rolled together using parsley, thyme, and flanked by bay leaves.

Karen England, Edgehill Herb Farm, is a recognized herb expert, garden speaker, and teacher of herb-related cooking classes in the San Diego area. She spoke to The San Diego Horticulture Society this past summer on Bay Laurel, and in a hand-out shared these adapted instructions for creating a bay wreath.

Make Your Own Laurel Bay Wreath Supplies Needed: Fresh bay branches, wreath form, paddle wire (available at craft stores), clippers, and optional ribbon.

Directions: With clippers, cut bay branches into lots of approximately of 3-4" sprigs. Using the wire, attach securely the sprigs to the wreath form. How much bay you will need depends on the type and size of the form you have chosen. Hanging Tip: Dry the finished wreath flat on a table for a week or so before hanging. This will prevent your wreath from drooping and drying lopsided.

Use: These completed wreaths can be hung as a decoration in a room or on a door, used for culinary purposes dried, or even as a fresh "laurel crown" on your head, just in time for Halloween. You could also make a garland swag of Bay Laurel using a length of stiff straight wire.

Please note, all laurels except the Bay/Sweet Bay/Laurel are poisonous. Make sure you identify the correct Bay Laurel Tree.

Please add your thoughts on Bay Laurel? Do you have a tree in your garden? What are your favorite uses? Have you ever seen a freshly made verdant bay wreath?

Highlighting Pelargonium "Limelight"

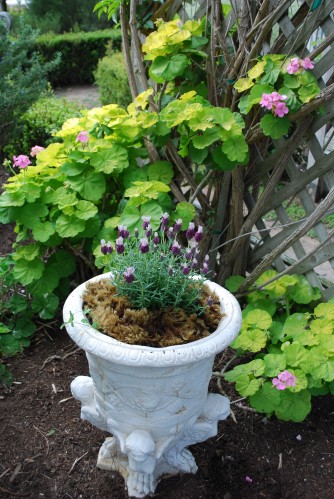
Springtime Pelargonium Limelight We are well into our wonderful fall splendor with its warm glowing autumn hues, so why am I mentioning the springtime Pelargonium "Limelight"? Because it is a must-have perennial in your garden. I thought if I highlighted it in the fall, it might afford you some time to find it, plant it, and enjoy it this upcoming spring.

Please forgive me as I really don't have a source for you either. You will have to diligently search the Internet for possible mail-order nurseries who might carry it or maybe request it at your favorite local nursery. My Pelargonium "Limelight" was a gift from a friend, in the form of a dainty small cutting. Aren't those the best kind of gifts? So put this one on your plant "wish list", and keep your eye out for it.

Pelargonium "Limelight" is a perennial which absolutely glows in the spring with its beautiful chartreuse foliage and dainty pink flowers. It is a pelargonium that is well-suited for zones 8, 9-11, and will grow in partial shade to sunny spots with moderate watering. I really think it thrives best in shady spots. If you are looking for the chartreuse foliage color in a very sunny spot, I suggest you look at the wonderful Euphorbia plant varieties. Pelargonium "Limelight" does have a tendency to want to climb slightly 1' to 3', as it grows and matures. I have it growing at the base of one of my arbors which is in a shaded, supported, and protected spot. Pelargonium "Limelight" gets the attention it deserves, as you pass through my arbor.

A few springs ago, I had the pleasure of a visiting local garden club, and everyone wanted to know the name of this perennial, Pelargonium "Limelight". Are you familiar with Pelargonium "Limelight", and have it growing in your garden now? Do you have trouble finding showy plants for your shady areas? Do you share with your friends "garden cutting" gifts?

High Spirits On Harvest Day

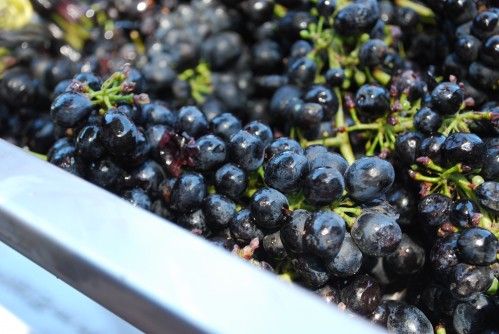
Just-Harvested Grapes Going Into Auger It is an accumulation of hours and days spent tending the vineyard. It is thousands and thousands of footsteps taken through the rows of vines with care. It is the weather and how it behaved throughout the year. It is the vines, and how themselves continue to grow and mature. It is how the grape clusters formed and dangled effortlessly from the vine. It is the end of our fourth growing season, and beginning of our second harvest. Every year is different, and what makes every vintage its own personality. It is our 2009 vintage. Consequently, there are high spirits on harvest day.

With an army of enthusiastic volunteers, armed with garden clippers, we all assemble to get hands-on instructions, and hear a blessing for this harvest. Last year's "Harvest Blessing" brought us great grape-growing weather, and beautiful grape clusters. In the photo above, our just-harvested grapes look so beautiful and luscious, you just know they taste delectable and are going to become a very drinkable and desirable wine.

We suggest to our volunteers to find a row partner, and harvest a row together. In 5 gallon clean buckets the grape clusters are carefully clipped off of the vines and dropped into the buckets. When the bucket is full, the bucket is brought up to the sorting table and crusher/destemmer area. Grape clusters are spread out on a large table and carefully checked for an undesirable grapes or clusters. The sorted grapes are then collected in a 40 lb lug, and dumped into the crusher/destemmer and augured to gently seperate the green stems and break open the grapes. This process creates a thick mixture of grape skins, seeds, and now juice.

This mixture is then poured into food grade plastic barrels, and cooled down with dry ice to mid 50 degrees F. The next day, it is brought back to room temperature, and the desired yeast is added to start the fermentation process.

Once all of the grapes have been processed, all of your equipment must be thoroughly cleaned, rinsed, and sanitized for their next use. This is one of the cardinal rules of wine making, always thoroughly clean and sanitize your grape processing equipment immediately after use.

With the grapes mixture carefully taken care of for the day, the "harvest feast" can begin in earnest, and everyone can rejoice in the newly harvested grapes which will become "vintage 2009". It is a time of celebration and high spirits.

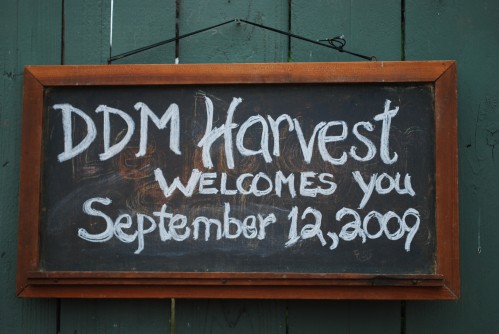
Harvest Welcome

Have you ever been to a vineyard harvest, and vineyard feast? Do you ever think about all that went into the making of a wine, when sipping wine from your glass?

Chickens And Children

Children Are Fascinated With Chickens There is something about chickens which just fascinate children. Whenever we have children visiting, it is always the chickens and chicken coop they want to venture to first. Maybe, it is because they don't have the opportunity to see chickens, other then in a book, or at the zoo. Maybe it is because chickens are relatively small in size, generally not aggressive, communicate in "coos and clucks", can be hand-fed treats, and often are as curious about children as children are about them.
If you have children, and you are thinking of getting chickens, I would encourage you. First, make sure you are zoned correctly for chickens. Second, research what breeds of chickens make the best pets. Third, know your children would treat your new hens as pets and with loving care.

When I say chickens, I really mean hens, and not roosters. Roosters can be aggressive, and are not for children, or some adults for that matter. Although roosters can be quite beautiful and magnificent in plumage, there is their daybreak cockle-doddle-do, sharp leg spurs, and aggressive territorial nature. Generally speaking, roosters are not for children.

I think chickens and children are a natural mix, because chickens can introduce them to, and teach them many beginning life lessons.

1) Hens can teach children about discipline and routine. Hens are living creatures, and must be cared for every morning and night. Hens must have feed and clean water every day. Their manure must be cleaned out and properly managed. In winter, and in bad weather, they must be protected from the cold, wet, drafts, and dampness. Chickens entertain themselves easily, and can thrive in a safe protected environment. They can not however, be neglected.

2) Hens can teach children beginnings about where their food comes from. They might actually observe a hen laying an egg, and what she goes through to lay that egg for them. Children may have the experience of holding a just-laid egg, still warm from a hen's body. A child might have the duty of collecting eggs every day as one of their chores.

3) Hens can teach children love. Hens if handled kindly from an early age can easily bond and become very tame and affectionate with whomever they see all the time, and who takes care of them. If allowed to roam out in your garden, chances are they will follow your children around in your yard, wanting to be close to them, too.

4) Hens can teach children about distinct personalities and traits, that become more pronounced over time. Let your children name their hens, and follow their personalities and observe their traits. We as people are not all the same, and neither are chickens.

5) Hens can teach enterprising children the basics of business. Children can catch on to how much it costs to keep their hens, deducting those costs from their egg sales. Who wouldn't want to buy fresh, oh-so-tasty organic eggs from your entrepreneurial son or daughter in the neighborhood.

6) Hens can be a special time that you and your children share and spend together taking care of them. Watch how your children interact with the hens. Hens are so entertaining and fun. Hens are more entertaining than TV or video games.

Show your children the best way to pick up your hens, and practice this till your children are comfortable. Never pick up a hen from her neck, wings, feet, or legs. Bend down, put both hands firmly, but not squeezing, over the side of her main body, keeping her wings close to her body and unable to flap. Pick her up gently, and hold her close to your body, and under your arm. When putting her down, keep her wings still against her body, and gently lower her to the ground. Never drop her. Hens are hardy, but also fragile. If unsure how your child or children will react with hens, always supervise them.

Depending on the age of your children, you might want to start out simply with letting your children pet your hens, feel their soft feathers, and possibly hand-feed treats of lettuce. Let your children visit them everyday. Gradually as your children get a little older, and more comfortable with your hens, introduce other aspects of taking care of them.

Generally speaking the smaller simple-feathered Bantam breeds are a nice size for small children. I always have enjoyed the Buff Orpington, Wyndotte breeds, which fall under the heavy-weight homesteader breeds. Although docile and easy going, these breeds might be too heavy for children to pick up. Some of the fancier designer chicken breeds are more skittish, and have more upkeep with keeping their feathers and plumage clean. Read up on chicken breeds with detailed descriptions of life spans, general traits, and you will find the best breed for you and your children. It is a personal preference.

Do you have chickens for your children now? What breed of hens do you have? Do you think having hens has been a valuable experience for your children?

How To Fan Espalier A Fruit Tree

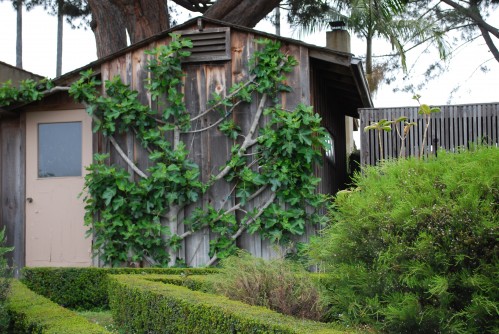
Black Jack Fig Tree Awakening In Spring There is a lot of interest in espaliered trees right now. It is an art form, visually attractive, and espaliered trees lend themselves easily to small spaces with high fruit yield. For espalier basics, including how to plant your tree initially and espalier patterns, see related post, The Art of Espalier Fruit Trees.
I have this wonderful shed in my middle garden that faces west, which I thought would be great to espalier a tree on. I chose a fig tree because they can cover a large area, and architecturally their branches, leaves, and fruit are so appealing.

Winter time, in Southern California, offers the best selection of dormant fruit trees, and is the best time to plant them. I started with a bare root Black Jack fig tree, which was about the size of a standard broom handle. It did have buds forming on its trunk, and that is what you look for. The buds on a dormant fruit tree trunk are the potential cordons or arms that grow out horizontally, and become your pattern.

With an espaliered fruit tree, you are going to need the support of a building or a wall of some kind. Mature fruit trees laden with fruit have some weight to them. See photo below.

How To Create A Fan Espalier Pattern For A Fruit Tree 1) Find your location. It should be a sunny west or south facing spot, year round.

2) Research your ideal fruit tree for your particular spot. The fan espalier pattern is an easy pattern to follow, and can cover a large surface. Some fruit trees lend themselves better to certain patterns than others. Popular fruit trees which are well suited for a fan espalier and informal fan espalier pattern are currant, gooseberry, fig, loquat, peach, nectarine, oriental persimmon, pineapple guava, and pomegranate.

3) Materials Needed: 12 to 14 gauge wire, 9/16″ double-pointed staples for wood fencing, wall mounts for masonry and corresponding equipment for stucco/concrete walls, bare root fruit tree preferably with ample buds on its trunk, compost, shovel, sharp clippers, green garden tape, chalk or marker, wire clippers, pliers and tape measure.

4) Chalk on your building or fence where your bare root fruit tree is going to be located. Measure in 18" increments, starting from the soil level, where each horizontal gauge wiring will go. Implement the gauge wiring horizontally across the width of your building or fence area in the 18" spacing increments. The gauge wiring is secured with 9/16" staples, if it is a wood structure. Now you have your support wiring in place. Plant your fruit tree at your chalked spot.

5) A fan espalier pattern is a basic pattern. On both sides the cordons grow from the fruit tree trunk, and angle upward and outward in a fan shape. Fruit tree buds emerge as shoots which are green, pliable, and delicate. As the fig tree buds begin to grow into shoots and eventually cordons, gently secure them with a bamboo stake and green tape against your building. Using green tape, make sure your bamboo stakes are also secured to the gauge wiring for support. This will train your cordons to stay in place.

6) In the photo above, you can see I persuaded my fig tree to grow above the shed door, too. Eventually, your fruit tree will mature, and become its own support. You can remove the bamboo training stakes and green tape, but keep the wire gauge in place.

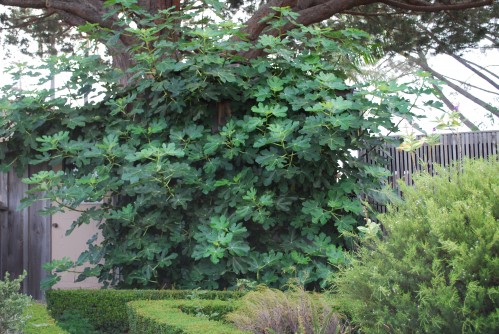
Black Jack Fig Tree In Fall Full Glory

7) The photo immediately above, captures the same mature fig tree in full growth in the fall, and laden with ripening figs. I prefer to let my fig tree "go wild", and not prune it back till it is dormant, and leaves have fallen off in the winter. If you wish to see more of your espalier pattern, then you must prune your fruit tree in the summer, and as necessary.

A fig tree has wonderful large leaves that cover quickly your whole espalier pattern in the course of the year. If you planted another type of fruit tree, chances are the leaves would not be as large, and your pattern would be more visible without a lot of pruning. With espalier patterns in general, pruning is a necessary part of keeping the pattern. If you have a smaller building or fence to espalier on, and a different type of fruit tree, you could space your gauge wiring at 12" increments.

To get started, start with a fruit tree that you like, grows well in a fan espalier pattern, and is ideal for your location. Follow the basic espalier fan pattern above. Have patience as your fruit tree begins to grow. It can take a few years to create your mature pattern.

Do you have an espaliered fruit tree in your garden? What kind of fruit tree is it? What pattern is it? Did you espalier it, or did you buy it espaliered? Where did you see your first espaliered fruit tree?