Posts in Garden Economizing
Grateful for Grapes
Happy Domaine de Manion Grapes

Happy Domaine de Manion Grapes

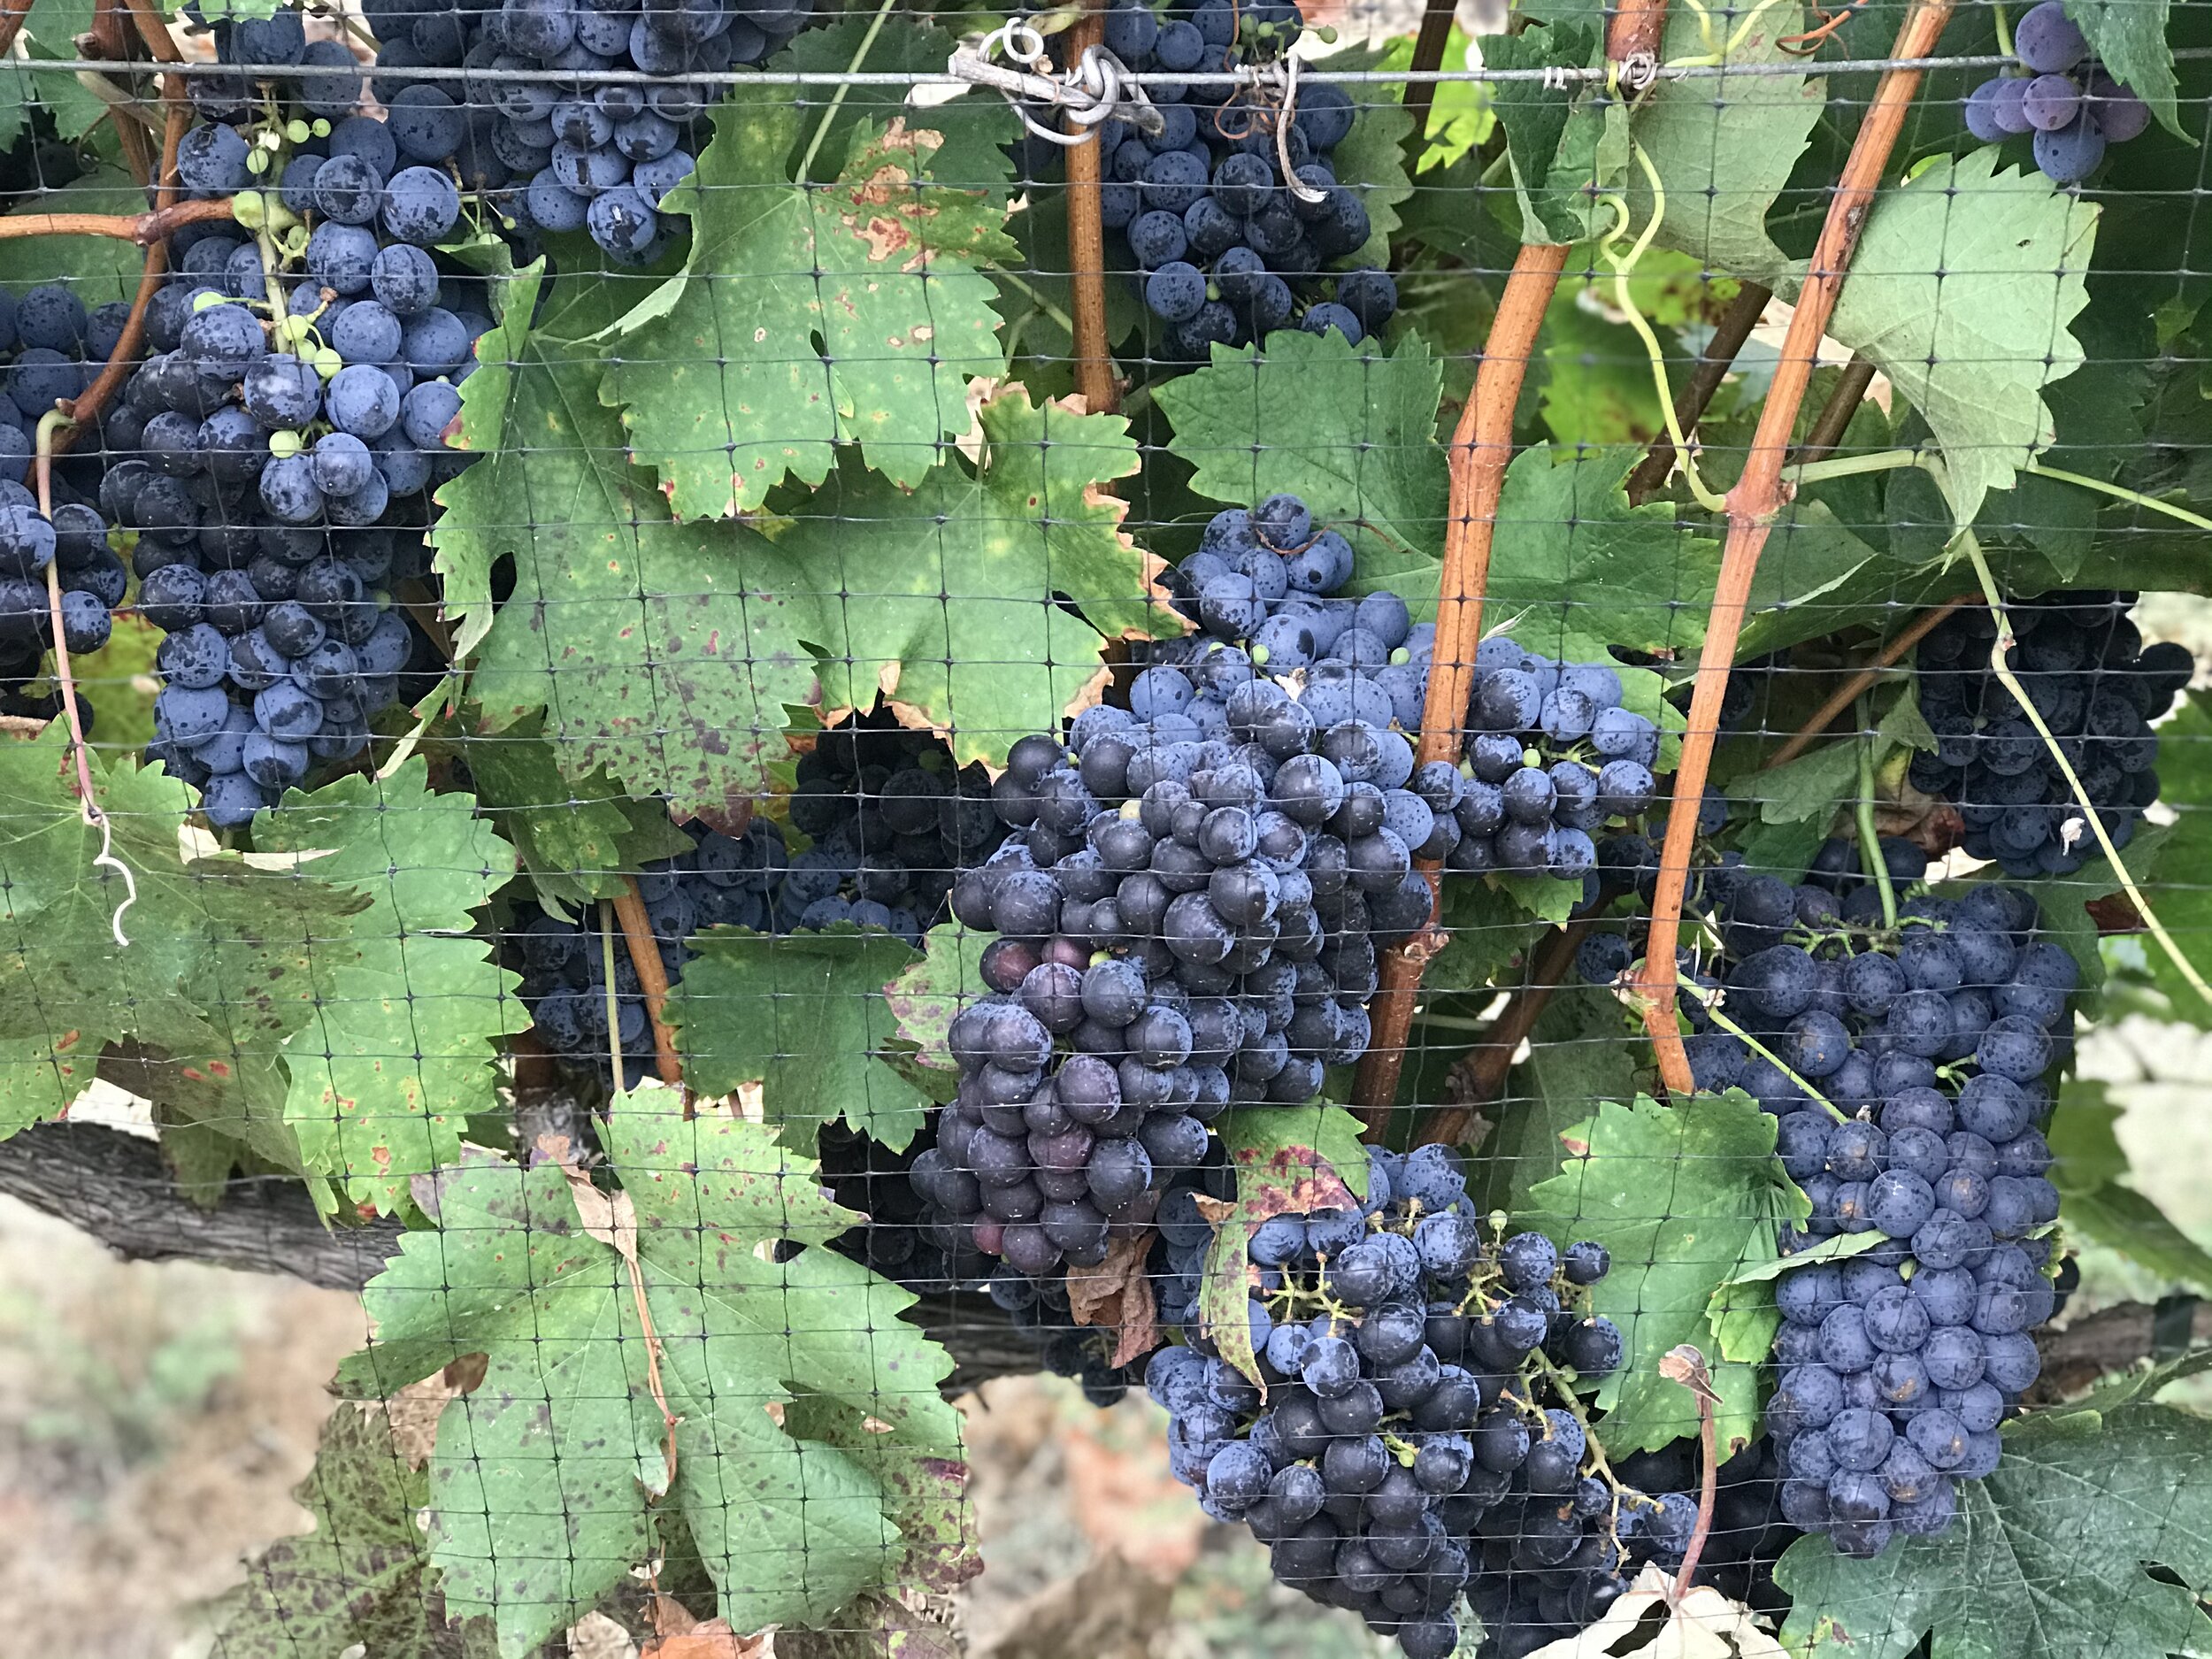
This year has certainly been a time of reflection at Domaine de Manion. It seems like while the outside world has been ever changing and experiencing unchartered territories, our vineyard has been constant and steady doing what it likes best, growing a great Syrah grape for us!

We, being my husband John and I, first planted our vineyard in 2006, dropped the fruit the first two years, so 2020 will be our twelfth harvest. It promises to be a great harvest with a high yield, and gorgeous clusters that give us reason to smile. Some of the grapevines are yielding more than 25 grape clusters per vine. It is often said that the best fertilizer for a vineyard is the vineyard manager’s footsteps, and this year we have been in the vineyard even more following shelter in place.

In the beginning it was one big experiment. Whether we had a good location for a vineyard? Could we grow a good grape? Could we find vineyard experts to help us get started? Could we learn to manage a vineyard? Could we make good wine? All unknown.

We pushed through the unknowns, being ahead of the curve as far as backyard vineyards go. Now backyard vineyards are prolific in San Diego County with all of their great attributes: 1) four-season beauty and interest, 2) drought tolerant, 3) capability to make wine, 4) becomes a wonderful lifestyle, 5) attracts great people and friends domestically and internationally.

It is a lot of work, and time consuming at times, as farming is. Some years are better than others, and we learn something new each year with our vineyard. It is a constant reminder that life is unpredictable. For now this year, our grapes and harvest promise to be an especially great one.

I encourage all of you, if you have an idea, dream, or goal, go for it! Even if you hear a few naysayers, and especially if it something that sticks in your mind. Follow it, and don’t stop at the first “no.” You never know what fruit it will bear!

Hedging Shasta Daisy
Shasta Daisies Make a Great Welcoming Entrance

Shasta Daisies Make a Great Welcoming Entrance

I want to share with you a great garden tip for an informal hedge, the perennial Shasta Daisy, Leucanthemum x superbum, Luther Burbank’s original hybrid. I struggled to find a suitable hedge or border for the entrance of my home because it is a sunny expansive area, had to look good year round, and present a warm and inviting entrance.

Why I like creating a border with Shasta Daisy:

1) I didn’t even buy the first starts, but were given to me by a dear friend. With the right happy conditions Shasta Daisy multiplies by itself, into a 2-4’ tall x 2’ wide mass. I wanted a fairly tall border in front of my Intrigue roses.

2) They bloom in July or mid summer when other parts of my garden are waning. The bright white flowers create a warm, cottage effect which put a smile on your face. Dead heading spent blooms encourages more blooming. Once all of the blooms are finished, I still have a beautiful green frilly perennial border throughout the year.

3) Shasta daisies like sun, but will fair well with some shade. They like moderate water. I have them on drip away from my home.

4) Butterflies are attracted to them, and often are fluttering around them.

5) In the spring or fall, I can divide plants to increase or reduce the width of my border.

6) Shasta Daisies glow in moonlight.

7) They are an excellent cut flower, last a long time in a vase, for your garden bouquets.

8) Shasta Daisies are easy to care for, fairly disease resistant, and respond well to a good pruning once a year.

9) Mass planting or repetition is always solid design.

Do you have this wonderful perennial in your garden now? Not only are Shasta Daisies great for a border or hedge, they do well in containers too!

Smiling Shasta Daisies Are Perfect Greeters

Smiling Shasta Daisies Are Perfect Greeters

Seed Sprouting Success

DSC_0894Chances are you have everything at your finger tips for creating perfect seed sprouting success. Sprouting seeds yourself is economical and expands your ability to grow many more varieties.

Materials Needed: 1) Saved plastic tubs with lids and with bottom holes for drainage. Fruit such as berries are often store-packaged in these containers. 2) Potting soil, or seed starting medium. 3) Desired seeds to sprout. 4) A handy chopstick, to make a hole or indention for your seeds. 5) Label gun to label your seeds started and the date. 6) Spray bottle with plain water to mist your seeds in soil medium. 7) Safe place with filtered sun exposure. 8) Time and patience.

I started my saved heirloom pumpkin seeds this way. I simply picked out my desired size plastic tub container. I filled each tub with moistened seed starting medium. I took a chopstick and made my number of desired holes in each tub for my seeds. I then filled each hole with a different heirloom pumpkin seed, and covered the seed over with soil. Once again, I misted each tub again. If you create a label and date for each tub containing seeds, you'll always know what you planted where and when. I keep the container lid closed, as it acts like a mini-greenhouse creating warmth and keeping in extra moisture for your seeds. This further helps germinate your seeds. I placed each tub in a filtered sun spot, in this case, in my potting shed. Every morning I opened the lid of the tub, and misted the seed starting medium, and closed the lid once more.

In about 8 days my pumpkin seeds had germinated and were too tall for me to close their lids. My pumpkin seedlings were now ready to be transplanted to shaped mounds in the ground. Since I started my seeds in my outdoor potting shed, they are already to be planted in the ground. If you had started seeds in your garage or an indoor environment, you might have to include the step of hardening off, or gradually acclimating your delicate seedlings to the outdoors for small periods of time before actually planting them in the ground.

Here is a fun link for more information on starting seeds, Seed Starting For Real People by Kelly Roberson. She suggests starting seeds in an empty egg carton, as an alternative to plastic containers. Roberson also includes a handy chart for Best and Worst Seeds to Sow Indoors and Outdoors. Thanks Kelly for sharing.

Please comment if you have a favorite method for seed starting success. Please share your favorite seeds to start yourself.

Composting with Grape Pomace

DSC_0971 I'm a firm believer in backyard composting. I love the idea of recycling what you have from your own garden, property, and kitchen scrapes into your own personal compost recipe. It is especially important to compost when you have backyard chickens. In fact, I really delve into this subject of backyard composting and backyard chickens in my book, Gardening with Free-Range Chickens for Dummies. See also my previous post, How To Compost In Your Backyard.

I call backyard composting a personal compost recipe of your life, because it is the layering of greens and browns, essentially by-products of your cooking, gardening, and property which create this custom compost mixture. My husband, John, and I have a small backyard vineyard. We use the grape pomace in our compost each fall. Grape pomace is the skins, seeds, and stems of the vineyard grapes after the wine making process. Grapes are a form of green or the fire that heats up the compost mixture, where the browns such as our chicken bedding, or rice hulls is considered the browns and fuel for the compost. Grape pomace heats up our compost to 160 degrees Fahrenheit, an incredible temperature for a backyard compost mixture. Composting with our grape pomace creates a rich organic material called humus, which will go back into our garden soil, and flowerbeds.

This past summer, I had the opportunity to visit Annie's Annuals and Perennials with my fellow garden bloggers attending the three day San Francisco Fling. One of the highlights of this three day adventure was Richmond east bay nursery, Annie's Annuals and Perennials. If you are ever in the Bay Area, make a visit to Annie's Annuals. A truly incredible nursery. Plants can be purchased online and shipped, too. While visiting Annie's Annuals, I noticed a sign and display, that grape pomace is one of her favorite compost materials.

DSC_0064

This was the middle of summer, and not Halloween, as this sassy and colorful mannequin greeted you at the nursery entrance. I can only imagine how she is costumed this week, two days before Halloween!

DSC_0056

Annie and I know a good thing, composted grape pomace. Try contacting your local vineyards in the fall, for possible sources of grape pomace. It is a great way to enjoy the colorful autumn season, maybe have a quick wine tasting, and purchase wonderful grape pomace for your backyard composting.

Omega-3 Chicken Forage Blend

Starting PVFS Omega-3 Chicken Forage Blend in Garden Flats In doing research for my upcoming new book, Gardening with Free-Range Chickens For Dummies (For Dummies (Home & Garden)) 
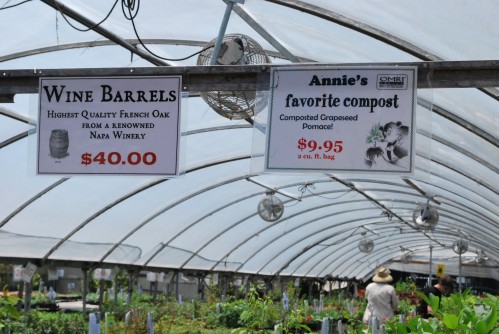
with coauthor Rob Ludlow of BackYard Chickens, I stumbled across Peaceful Vally Farm Supply's Omega-3 Chicken Forage Blend. What a find!

This organic forage blend is a real treat for your hens. It is available in 1 pound to 1,000 pound quantities. You can grow in it on a large scale in a pasture, in your garden, in a chicken run or zone, or even in 17" garden flats like I did.  Warning, Peaceful Vally Farm Supply recommends not grazing horses on this mixture. Flax can form prussic acid when exposed to frost.

This forage blend is a warm season crop in mild climates, and can be sowed after danger of frost in cooler climates. It needs regular irrigation, and most likely needs to be replanted each year. Keep your seeds moist, and your chickens away from this blend until it is the desired height for your chickens. Surprisingly, seeds germinate immediately, and in less than two weeks time is 3" to 5" high, the perfect height for chickens to graze.

In 2 weeks time, the forage blend is ready to be given to your chickens.

Peaceful Vally Farm Supply has refined this unique forage blend from their own expertise, feedback from backyard poultry enthusiasts, and university research. This blend consists of alfalfa, buckwheat, clover, flax, millet, rye, and rye grass. Feeding your chickens this forage blend ensures their eggs will be rich in Omega-3  fatty acids, an important component of a healthy diet for those eating their eggs.

My happy hens love this forage blend, and your chickens will too

My chickens go crazy for this blend as you can see in the photo. Most chickens devour the blend before the plants can set seed. Peaceful Valley Farm Supply tells me you can try and grow this forage blend in a raised bed with a protective wire over it to keep your chickens from eating it roots, and all. With the protective wire, the grass might have time to replenish itself, if you keep your chickens away from it as regrowth begins.This blend is not only great for chickens, but ducks and turkeys,too.

If you order the Omega-3 Chicken Forage Blend from Peaceful Vally Farm Supply for your chickens, be sure and tell them VintageGardenGal recommended it.

Simple Country Bouquet from the Garden

Besides growing your own edibles, it is a great idea to grow your own flowers for bouquets. Here is a simple country bouquet idea for an event I had this spring.

Flowers. My perennial sweet peas were abundant and in bloom. I have written about my lovely perennial sweet peas in more detail, Perennial Sweet Peas. Perennial sweet peas are easy to grow, bloom spring to summer, and return year and year. Perennial sweet peas are one suggestion. Let your garden dictate your bouquet.

Vessel. I collected Bulgarian yogurt jars back in the seventies. When traveling through Bulgaria, yogurt was sold in these simple-shaped wide mouth jars. Such a nice size, and an appealing shape. You can use any vessel you have on hand. Try using vessels which appeal to you and are a little out of the ordinary.

Embellishment. These Bulgarian jars are clear. For fun, and a little color, I lined the jars with peppermint geranium leaves. These leaves are very soft and fuzzy. They hold up well in water for several days. The leaves are the prettiest "Ireland" green which is fabulous with the various pinks of the perennial sweet peas. I could have added a pretty ribbon, or glass balls at the bottom of the jars.

In a way, this simple country bouquet from my garden is exactly what my dear friend, Debra Prinzing, and her photographer, David E. Perry, are trying to convey in their new book, The 50 Mile Bouquet: Seasonal, Local and Sustainable Flowers. Following after the "Slow Food" movement, Prinzing and Perry introduce us to the "Slow Flower" movement. Do you know where your flowers are grown? When they were harvested? If chemicals were used to grow them? Prinzing and Perry introduce us to local organic flower growers, gathering, and ultimate "Slow Flower" design. Using fresh flowers out of our own gardens is one easy step in this direction.

Please share if you are aware of local organic flower growers in your area? Please share if you create your own organic flower bouquets out of your own garden.

Handmade Garden Projects

Seattle-based freelance garden writer, author, blogger, and new editor of Pacific Horticulture, Lorene Edwards Forkner, has an exciting new book out called Handmade Garden Projects.

Swinging through Southern California on a recent speaker circuit, Lorene had time to give a special hands-on demonstration and sell some of her "hot" books. Lorene demonstrated her Galvanized Wire Plant Support craft to my enthusiastic garden friends. It was a beautiful Monday morning, and there under my Torrey pine, she crafted a wire garden cloche from 36" galvanized wire fencing. Lorene's wit and humor was "icing on the cake" as she maneuvered through her demo. Thanks Lorene!

Lorene has been a special friend of mine for several years now. Last summer as part of "Seattle Fling" (a national garden blogging event) I attended, and Lorene helped organize, I had a chance to visit Lorene's special garden. There, I saw first hand many of the projects created and photographed for Handmade Garden Projects.

There are  33 projects in this book, with two options to every project, which makes a total of 99 potential projects you can make. Her book is cleverly organized into six chapters, such as "The Ground Floor" and "Supporting Acts." Each garden project is beautifully photographed and detailed in easy-to-follow steps. True to my own heart, Lorene embraces eco-friendly salvaging and re-purposing for these projects. Above all, she urges us all to "Go outside--it's a nice day!"

Publisher, Timber Press is hosting a Handmade Garden Projects Blog Tour this week with several other participating garden blogs. I invite you to visit these fab gardening blogs from all over the country, and read more about what they have to say about the talented Lorene Edwards Forkner, and her new book.

http://www.amateurbot-ann-ist.com/ http://torontogardens.blogspot.com/ http://wwwrockrose.blogspot.com/ http://heavypetal.ca/ http://www.growingagardenindavis.com/ http://bonneylassie.blogspot.com/ http://bwisegardening.blogspot.com/ http://www.bumblebeeblog.com/ http://www.thebikegarden.com/ http://www.ourlittleacre.com/ http://www.commonweeder.com/ http://www.debraprinzing.com/

Organize Your Garden Shed

Now is a great time to get organized in the New Year.  Besides the usual closets, pantry, and garage, don't forget about organizing your garden sheds , too. A neat and organized garden shed will help ensure you have a healthy, productive, and thriving garden.

Take a look at this garden shed, from a client of Karen Contreras of Urban Plantations. Urban Plantations is a design and maintenance of edible landscape for an urban environment in the Greater San Diego area.

Check List for Your Garden Shed: 1) A garden shed should be clean, and well lit. The door opening is big enough to move bulky tools and bags around easily. 2) Keep a huge calendar to jot down, when seeds and seedlings were planted, harvest dates, and important days to remember. 3) A huge white board, keeps your "To Do" list visible and on track. 4) A cork board keeps important charts and papers in place, and easily accessible. 5) A place to hang a garden hat and coat is a must.

6) Garden tools are clean, organized, and hung up on a wall. 7) Sturdy shelving provides space and organization for garden products.

Take a cue from this garden shed, and start your gardening year on the right "hoe." Please share if you have a garden shed for your tools, equipment, and products. Please comment how you organize your garden shed.